
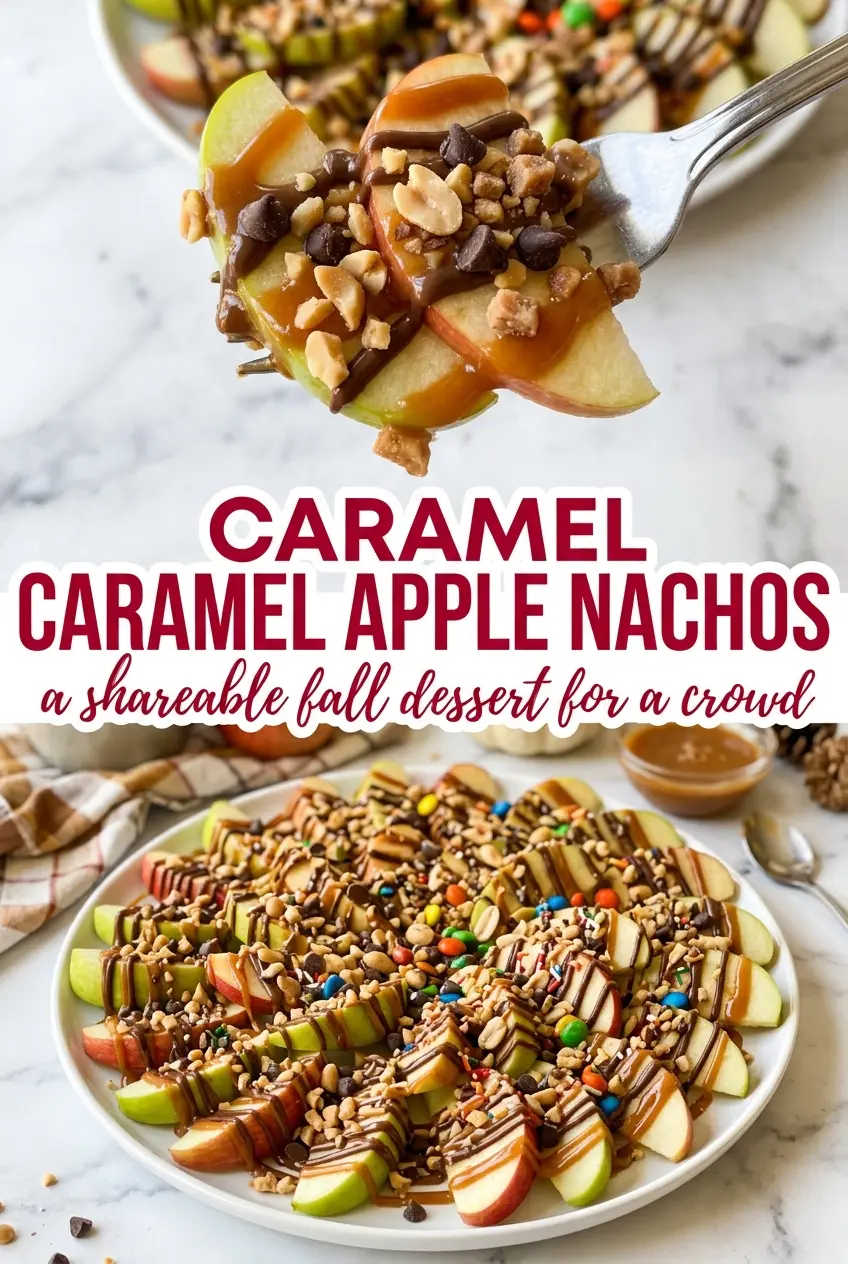
Crisp apple slices, sticky caramel, and a scatter of crunchy toppings turn into a dessert that disappears fast. Caramel apple nachos hit that sweet spot between playful and practical: no baking, no fussy assembly, and no need to commit to a whole pie when you just want something fun on a platter. The apples stay fresh and snappy, while the drizzles and toppings give every bite a little contrast.
The trick is in the timing and the layering. A quick toss with lemon juice keeps the apples from browning, and arranging them in an overlapping fan gives you a surface that catches the caramel instead of letting it pool underneath. I like to use both caramel and chocolate because the caramel brings that classic candy-apple flavor while the chocolate rounds it out and keeps it from tasting one-note.
Below, you’ll find the small details that keep the apples crisp, the toppings balanced, and the whole platter looking generous instead of messy. A few minutes of care is all it takes.
The caramel stayed right on the apple slices and the chocolate drizzle set up just enough that it didn’t turn into a puddle. I brought this to a game night and people kept coming back for “just one more” slice.
Caramel apple nachos disappear fast, so pin this platter for the next time you want an easy no-bake dessert with crisp apples and candy shop toppings.
The trick to keeping caramel apple nachos crisp, not soggy
The biggest mistake with this kind of dessert is building it too far ahead. Apples start releasing moisture as soon as they’re sliced, and once the caramel hits that surface, any extra liquid shows up fast. A platter that looks perfect at five minutes can turn slippery by the time everyone reaches for a second serving.
The fix is simple: slice the apples right before assembly, use lemon juice sparingly, and keep the toppings ready to go before the fruit is on the platter. Thin slices help the caramel cling without weighing the apples down, and overlapping them gives you more surface area for the drizzle. You want the apples cold, dry, and arranged with enough space that the topping mix can settle into the gaps instead of sliding off.
What each topping is doing here

- Apples — Use firm, crisp apples that hold their shape after slicing. Tart varieties like Granny Smith keep the dessert from turning cloying, while sweeter apples make the platter taste more candy-like. If you only have a softer apple, chill it well first and slice it a little thicker so it doesn’t collapse under the toppings.
- Lemon juice — This does the job of slowing browning, but it should be a light toss, not a soak. Too much leaves a sharp citrus note that competes with the caramel. Fresh lemon is best here, though bottled works in a pinch if you use just enough to coat the slices lightly.
- Caramel sauce — Thick caramel clings to the apples and gives you that glossy finish people expect from caramel apples. Store-bought sauce is fine as long as it’s pourable; if it’s too stiff, warm it gently until it ribbons off a spoon. Homemade caramel works too, but let it cool slightly so it doesn’t slide right off the fruit.
- Chocolate sauce — A little chocolate adds contrast and keeps the dessert from tasting like straight caramel. You want it pourable enough to drizzle in thin lines, not a hot fudge situation that floods the platter. If yours is too thick, loosen it with a teaspoon of warm cream or milk.
- Peanuts, mini chocolate chips, and toffee bits — These are the crunch and texture that keep each bite interesting. The peanuts bring salt, the chips add little hits of chocolate, and the toffee bits give you a buttery crunch. Swap in chopped pecans or almonds if that’s what you have, but keep at least one crunchy element or the platter loses its appeal fast.
Building the platter so every bite gets topping
Tossing the Apples First
Slice the apples just before you assemble the platter, then toss them lightly with lemon juice. You’re not trying to soak them; you’re just slowing oxidation enough to keep the slices looking fresh. If the slices sit in a bowl too long, they’ll still soften and collect juice at the bottom, which makes the final platter messier than it needs to be.
Fanning for Coverage
Arrange the slices in overlapping rows on a large platter, almost like a scattered deck of cards. That overlap matters because it gives the sauces something to cling to instead of letting them run straight to the plate. If the slices are piled too tightly, the toppings can’t reach the lower layers; if they’re too spread out, the platter looks bare and the drizzle lands unevenly.
Drizzling Without Drowning
Warm the caramel and chocolate just enough that they flow easily, then drizzle from a little height in thin ribbons. Start with less than you think you need, then circle back if the apples still look underdressed. A heavy pour buries the crunch and makes the whole dessert harder to serve cleanly, while lighter drizzles leave room for the toppings to stay visible and textured.
Finishing at the Table
Add the peanuts, chocolate chips, and toffee bits right after the sauces go on so they stick instead of rolling off. Serve immediately while the apples are still cold and crisp. If the platter sits around, the toppings will soften and the edges of the apple slices will start to weep.
How to make this platter work for different tastes
Dairy-Free Caramel Apple Nachos
Use dairy-free caramel sauce and a dairy-free chocolate sauce, then keep the rest the same. The result is still rich and sticky, but the sauces can be a little looser, so drizzle them in thinner lines and serve right away. If you choose a coconut-based caramel, expect a faint coconut note that plays well with apples and toffee.
Nut-Free Version
Skip the peanuts and use extra toffee bits, crushed pretzels, or sunflower seeds for crunch. You still get contrast and texture, but you avoid the sharp, roasted nut flavor. If you’re serving a crowd, this version is easier to keep safe because the toppings stay obviously nut-free instead of relying on a small substitution buried in the mix.
A More Dessert-Like Version
Add crushed graham crackers, mini marshmallows, or a spoonful of peanut butter drizzle for a richer, more over-the-top platter. That pushes the recipe closer to a shareable dessert board and adds heft for people who want something more filling than fruit and sauce. Keep the apple slices crisp or the whole thing starts to taste heavy instead of fresh.
Storage and Reheating
- Refrigerator: Best eaten right away. Leftovers can be chilled for about 1 day, but the apples soften and the sauces thin out as they sit.
- Freezer: Don’t freeze this. The apples turn mushy and watery once thawed, and the sauces separate.
- Reheating: There isn’t a true reheating step here. If the caramel thickens in the fridge, let the platter sit at room temperature for a few minutes, then add a fresh drizzle before serving.
Questions I Get Asked About This Recipe
Caramel Apple Nachos
Ingredients
Method
- Toss the apple slices with the lemon juice to prevent browning, coating them evenly so they stay fresh-looking.
- Arrange the apple slices in an overlapping fan pattern on a large platter, leaving a little space between slices so the drizzle pools.
- Drizzle the caramel sauce generously over the apples so it sinks slightly between slices for glossy coverage.
- Drizzle the chocolate sauce over the top to create ribbons across the caramel layer.
- Sprinkle with chopped peanuts, mini chocolate chips, and toffee bits to add crunchy texture and visible speckles.
- Serve immediately while the apples are fresh and crisp so the toppings stay crunchy and the apple slices don’t soften.