
Golden, flaky sourdough pop tarts bring the kind of bakery-style crunch that makes you pause after the first bite. The crust bakes up crisp at the edges and tender in the middle, with a tang from the sourdough discard that keeps the sweetness from feeling flat. The Nutella filling melts into the seams, the toasted hazelnuts stay pleasantly crunchy, and the vanilla glaze sets into a thin, glossy finish that cracks just slightly when you bite through it.
The part that makes these work is the cold dough. Sourdough discard gives the pastry a little character, but the butter has to stay in distinct pieces so the crust bakes into layers instead of turning dense. Chilling the assembled tarts before they go into the oven matters just as much as the mixing stage, because that extra rest keeps the edges cleaner and helps prevent the filling from leaking out before the pastry has a chance to set.
Below, I’m walking through the details that matter most: how to keep the crust flaky, how to fill them without overstuffing, and the one finishing move that makes them look bakery-made instead of homemade in a hurry.
The crust came out crisp and flaky, and the Nutella-hazelnut filling stayed put instead of leaking all over the pan. Chilling them before baking made a huge difference, and the flaky salt on top gave them that bakery-style finish.
Love the flaky sourdough crust and Nutella-hazelnut center? Save these bakery-style pop tarts for the next time you want a crisp, chocolate-filled pastry with a salty finish.
The Cold Butter Trick That Keeps These Sourdough Pop Tarts Flaky
The difference between a crisp, layered pop tart and a heavy one comes down to temperature. Cold butter needs to stay in little pockets inside the dough, because those pockets melt in the oven and leave behind the flaky layers everyone wants. If the butter softens while you’re mixing or rolling, the pastry starts acting like pie dough that’s been worked too much: tighter, tougher, and less crisp.
The sourdough discard adds flavor and a little tenderness, but it also brings moisture, so the dough needs a short chill before it gets rolled out. That rest gives the flour time to hydrate and makes the dough easier to handle. If it feels sticky right after mixing, resist the urge to keep adding flour. Chill it first. Most of the time, that fixes the problem without drying out the pastry.
- Sourdough starter discard — This brings the tang that keeps the pastry from tasting one-note. It doesn’t replace the butter or the flour structure, so use discard that’s unfed and pourable, not stiff dough starter.
- Cold butter — This is the engine of the flaky texture. Cubes that stay visible in the dough are what you want. If your butter is getting soft, pop the bowl in the fridge for 10 minutes before rolling.
- Nutella — The filling needs something smooth enough to spread but thick enough to stay inside the pastry. Straight Nutella works well because it firms up again as it bakes. If you warm it, use just enough to loosen it, not enough to make it runny.
- Toasted hazelnuts — These matter more than they look like they should. The crunch cuts through the soft filling and makes the middle taste layered instead of just sweet. If you skip them, the tart loses the texture contrast that makes it special.
- Flaky sea salt — Use the good finishing salt here. It doesn’t just add saltiness; it sharpens the chocolate and hazelnut flavor and keeps the glaze from tasting too sugary.
Rolling, Filling, and Sealing Before the Filling Has a Chance to Escape
Building the dough
Mix the flour, salt, and sugar first so everything is evenly distributed before the butter goes in. Cut the butter into the flour until you still see small pieces, some pea-sized and some a little larger. Add the sourdough starter and cold water just until the dough comes together. If you work it until it looks perfectly smooth, you’ve already gone too far and the baked crust will lose its layers.
Resting and rolling
Chill the dough for at least 30 minutes before rolling. That rest keeps the butter firm and gives the discard time to settle into the dough. Roll it on a lightly floured surface to an even thickness so the tops and bottoms bake at the same rate. If the dough starts shrinking back, it needs a few more minutes in the fridge, not more force from the rolling pin.
Filling without overstuffing
Cut clean rectangles and leave enough border around the edges to crimp properly. Spoon a modest amount of Nutella onto each base, then sprinkle on the crushed hazelnuts. Too much filling is the fastest way to get blowouts in the oven, especially with a pastry this tender. The goal is a visible seam of filling at the edge, not a pastry that looks stuffed to the point of bursting.
Crimping and baking
Press the edges together firmly with a fork so the seal holds while the butter melts. Before the pan goes into the oven, chill the assembled tarts again if you have time; cold pastry bakes up cleaner and flakier. Bake at 375°F until the tops are golden and the edges look set. If the tops are pale, they need a few more minutes, but don’t wait for deep browning or the filling will start to dry out.
The glaze and finish
Let the pop tarts cool for about 10 minutes before glazing so the icing clings instead of melting off. Dip the tops into the vanilla glaze, then finish with flaky salt and extra hazelnuts before the glaze sets. That timing matters. If you wait too long, the glaze turns dull and the toppings won’t stick.
How to Adapt These Sourdough Pop Tarts Without Losing the Good Parts
Dairy-Free Version
Swap the butter for a firm plant-based baking stick and use a dairy-free chocolate-hazelnut spread. The crust won’t taste exactly the same, but the texture still comes out flaky if the fat stays cold. The one thing that changes most is the glaze, so use a dairy-free milk that’s neutral, like oat or almond.
Gluten-Free Adaptation
Use a 1:1 gluten-free baking flour that includes xanthan gum, and keep the dough chilled a little longer before rolling. Gluten-free dough is usually softer and more fragile, so roll it between sheets of parchment instead of trying to move it bare-handed. The result will be more tender than shattery-flaky, but the flavor still lands well.
More Nutella, Less Crunch
If you want a smoother center, leave out the hazelnuts from the filling and use them only on top. The pastry will still bake properly, but you’ll lose the contrasting crunch inside. I like the original version better because the nuts keep the filling from feeling soft in one note.
Storage and Reheating
- Refrigerator: Store in an airtight container for up to 3 days. The crust softens a little in the fridge, but the flavor stays good.
- Freezer: Freeze unglazed baked pop tarts tightly wrapped for up to 2 months. Glaze after reheating so it stays glossy instead of sticky.
- Reheating: Warm in a 325°F oven or toaster oven until the pastry crisps back up. The common mistake is using the microwave, which makes the crust soggy and the filling greasy.
Answers to the Questions Worth Asking
Sourdough Pop Tarts
Ingredients
Equipment
Method
- In a mixing bowl, combine all-purpose flour, salt, and sugar, then cut in cold butter cubes until the mixture looks pebbly. Add sourdough starter (discard) and cold water and stir just until the dough comes together.
- Press the dough into a disk, wrap, and chill for 30 min in the refrigerator. Keep the dough cold for crisp, flaky layers when baked.
- On a lightly floured surface, roll the chilled dough and cut it into rectangles. Keep scraps covered while you work so the dough stays cold.
- Spoon Nutella and crushed toasted hazelnuts onto the center of half the rectangles, leaving a border around the edges. Aim for a visible filling layer so you get a dark seam at crimping.
- Place the remaining rectangles on top and crimp the edges firmly with your fingers. Seal well to prevent filling from leaking during baking.
- Arrange the pastries on a sheet pan and bake at 375°F for 20–22 min until golden. Look for deep browning at the crimped edges and set centers.
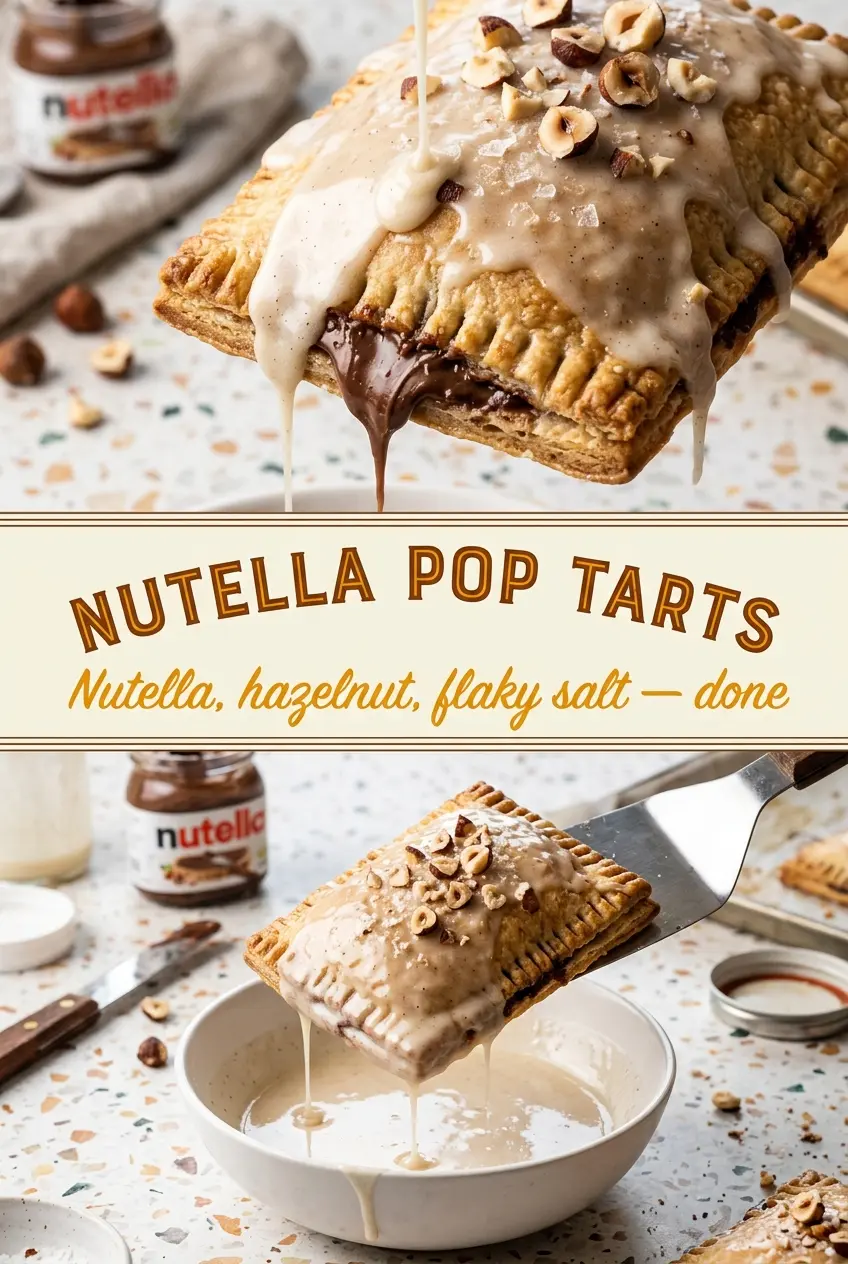
- Let the pastries cool for 10 min, then dip the tops in vanilla glaze. Allow excess glaze to drip back onto the pastries before topping.
- Sprinkle flaky sea salt and extra crushed hazelnuts over the glazed tops right away. Finish immediately so the crunchy topping adheres before the glaze sets.