
Mini cheesecake bites are at their best when the crust stays crisp, the filling sets up cold and creamy, and the berry topping tastes bright instead of syrupy. These no-bake berry cheesecake bites hit that balance. The graham cracker base gives you a clean little crunch, the filling stays light from whipped cream folded in at the end, and the berry compote adds enough tang to keep each bite from leaning too sweet.
The small size matters here. A full cheesecake needs long bake time and careful temperature control, but these set in the fridge with nothing more than a firm crust, a smooth filling, and enough chill time for the cream cheese to hold its shape. Greek yogurt adds a little sharpness that keeps the filling from tasting flat, and the lemon in the berries wakes up the whole dessert. If your crust seems crumbly or your filling feels loose, the fix is usually in the prep: pack the crumbs hard and chill the bites long enough for the cream to do its job.
Below, I’ll walk through the part that matters most — how to keep the filling fluffy without making it runny — plus a few smart swaps and storage notes for making these ahead.
The crust held together perfectly and the cheesecake filling was light but still set up after chilling overnight. The berry topping kept it from being too sweet, and my kids kept grabbing them straight from the fridge.
Save these no-bake berry cheesecake bites for a creamy chilled dessert with a crisp graham crust and bright berry topping.
The Secret to a No-Bake Cheesecake Bite That Actually Sets
The biggest mistake with no-bake cheesecake is rushing the structure. If the cream cheese is still cold and lumpy when you start, the filling never turns smooth. If the whipped cream is beaten too soft, the filling won’t hold its shape once it chills. This version works because each part does a different job: the cream cheese brings body, the yogurt adds tang and a little looseness, and the whipped cream lifts the texture without turning it dense.
The other key is the crust. A crumb base for bite-size desserts needs to be packed firmly enough to release cleanly from the muffin tin, or it falls apart at the first lift. Melted butter gives the crumbs their glue, but pressure does the rest. Press them down with the bottom of a small glass or measuring spoon until they look compact and slightly damp, not sandy.
- Graham crackers — These give the crust its classic cheesecake flavor. Crushing them finely helps the base hold together better, but a few small crumbs add a nicer texture than dust.
- Cream cheese — Full-fat cream cheese gives the filling its structure. Soften it fully before mixing; if it’s even a little chilly, the filling can turn grainy.
- Greek yogurt — This adds tang and keeps the filling from tasting heavy. Plain full-fat yogurt works too, but thinner yogurt will make the mixture looser.
- Heavy whipping cream — Whip it to medium peaks, not stiff peaks. You want it light and stable so it folds in cleanly without deflating.
- Mixed berries — Fresh berries give the topping a brighter finish than frozen fruit, which tends to release more water. If frozen is what you have, cook it a little longer so the compote thickens.
- Lemon juice — This sharpens the berry topping and keeps it from tasting flat. Bottled juice works in a pinch, but fresh lemon gives a cleaner finish.
Building the Layers So the Bites Hold Their Shape

Stir the melted butter into the graham crumbs until every bit looks damp, then divide the mixture between the muffin cups. Press hard. The crust should look compact and slightly glossy from the butter, not loose enough to spill when you tip the pan. Chill it while you build the filling so the butter can set back up.
For the filling, beat the cream cheese, yogurt, and sugar until completely smooth before the whipped cream goes in. That first stage is where any lumps disappear. Once the whipped cream is folded in, stop mixing as soon as the texture turns even and airy. Overmixing at this point knocks out the air and makes the filling heavy.
Cook the berries with lemon juice just until they break down and start to look jammy. You’re not making a stiff preserve here. The topping should spoon easily over the chilled cheesecake and settle in a soft mound. Let it cool before adding it, or the heat will soften the filling underneath.
Pressing the Crust
Mix the butter and crumbs until no dry patches remain, then press the mixture firmly into the muffin tin. The crust should feel dense when tapped with a spoon. If it looks sandy after pressing, it needs more pressure, not more butter.
Whipping and Folding the Filling
Beat the cream cheese mixture until smooth and creamy, then fold in the whipped cream with a light hand. Folding keeps the filling fluffy. If you stir it aggressively, you’ll flatten the cream and the bites will set up more like a cheesecake spread than a molded dessert.
Cooking the Berry Topping
Simmer the berries and lemon juice just until the fruit collapses and the juices thicken slightly. The topping should still look glossy and spoonable. If it gets reduced too far, it turns stiff and sticky once chilled, which hides the fresh berry flavor instead of highlighting it.
Chilling Before Serving
Refrigerate the bites until the filling feels firm when pressed lightly in the center. Four hours is the minimum, but overnight gives you the cleanest shape. If you try to add the berry topping too soon, it slides into the filling and softens the crust before it can set.
How to Adapt These Cheesecake Bites Without Losing the Texture
Gluten-Free Crust Swap
Use gluten-free graham-style crackers or crushed gluten-free cookies in the crust. The texture stays close to the original as long as the crumbs are fine and the butter ratio stays the same. Some gluten-free crumbs are drier, so pack them especially firmly.
Dairy-Free Version
Use dairy-free cream cheese, coconut yogurt, and whipped coconut topping. The result is a little softer and slightly more coconut-forward, but it still chills into neat little bites if you give it enough time. Skip the lightest plant-based products; they usually set too loosely for this format.
Different Fruit Topping
Blueberries, raspberries, or strawberries all work here. Strawberries need a little more cooking to break down, while raspberries thicken fast and give a sharper flavor. Keep the lemon juice either way; it keeps the topping bright instead of jam-like.
Storage and Reheating
- Refrigerator: Store covered for up to 4 days. The crust softens slightly after day one, but the flavor stays good.
- Freezer: Freeze the cheesecake bites without the berry topping for up to 1 month. Thaw in the refrigerator, then add the topping just before serving so it stays fresh.
- Reheating: No reheating needed. Serve these chilled. If they sit out too long, the filling loosens and the crust loses its clean edge.
Questions I Get Asked About This Recipe
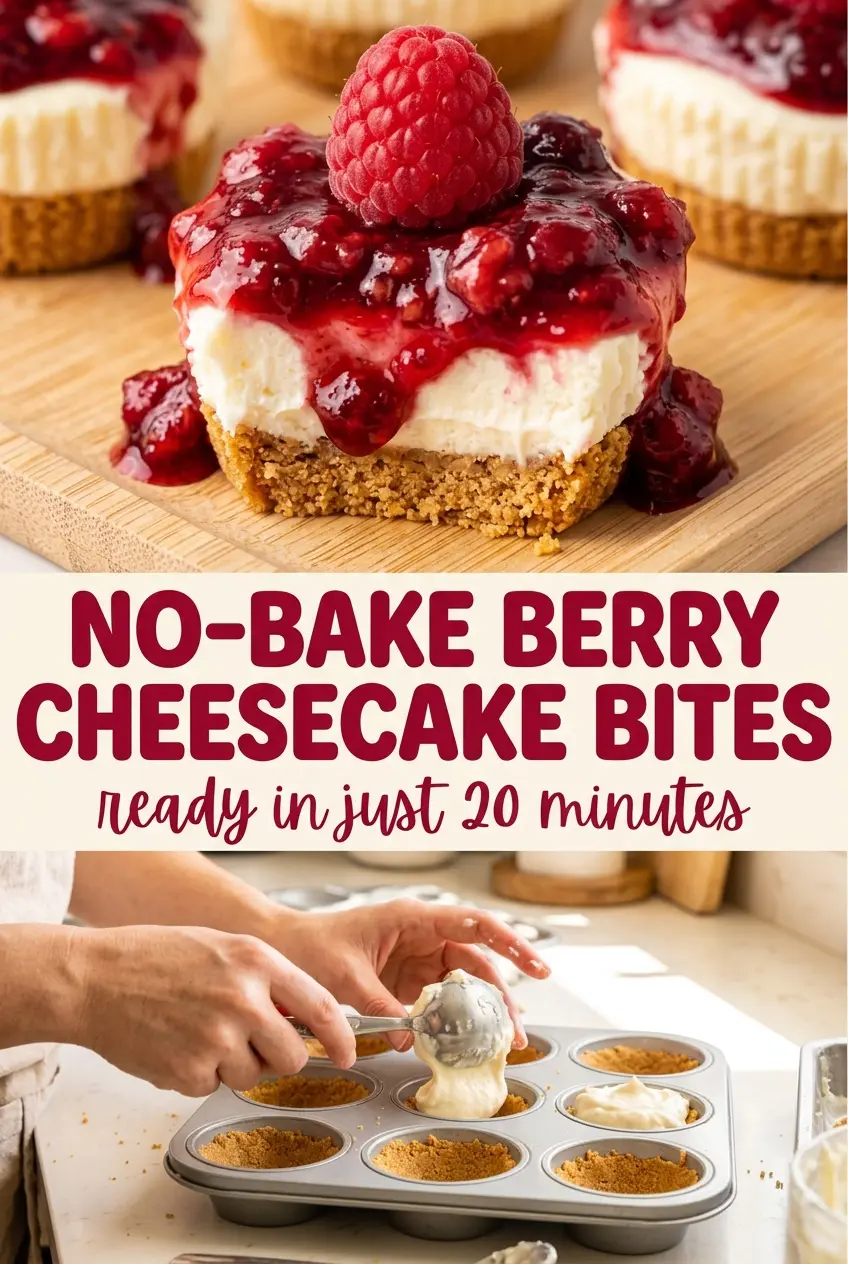
No-Bake Berry Cheesecake Bites
Ingredients
Equipment
Method
- Stir the melted butter into the crushed graham crackers until fully combined, with the mixture looking like damp sand.
- Distribute the crumb mixture into muffin tin cups, pressing down firmly to form a crust.
- Refrigerate the crusts while you prepare the filling and berry topping.
- Beat the cream cheese, Greek yogurt, and sugar together until smooth, then fold in the whipped cream for a thick, creamy filling.
- Scoop the cheesecake filling on top of the chilled crusts and refrigerate for at least 4 hours.
- Cook the mixed berries with lemon juice in a saucepan over medium heat until they break down into a compote, stirring occasionally until thickened, about 10 minutes.
- Cool the berry compote to room temperature.
- Spoon the cooled berry compote over the chilled cheesecake bites just before serving, creating a ruby-red swirl on top.