
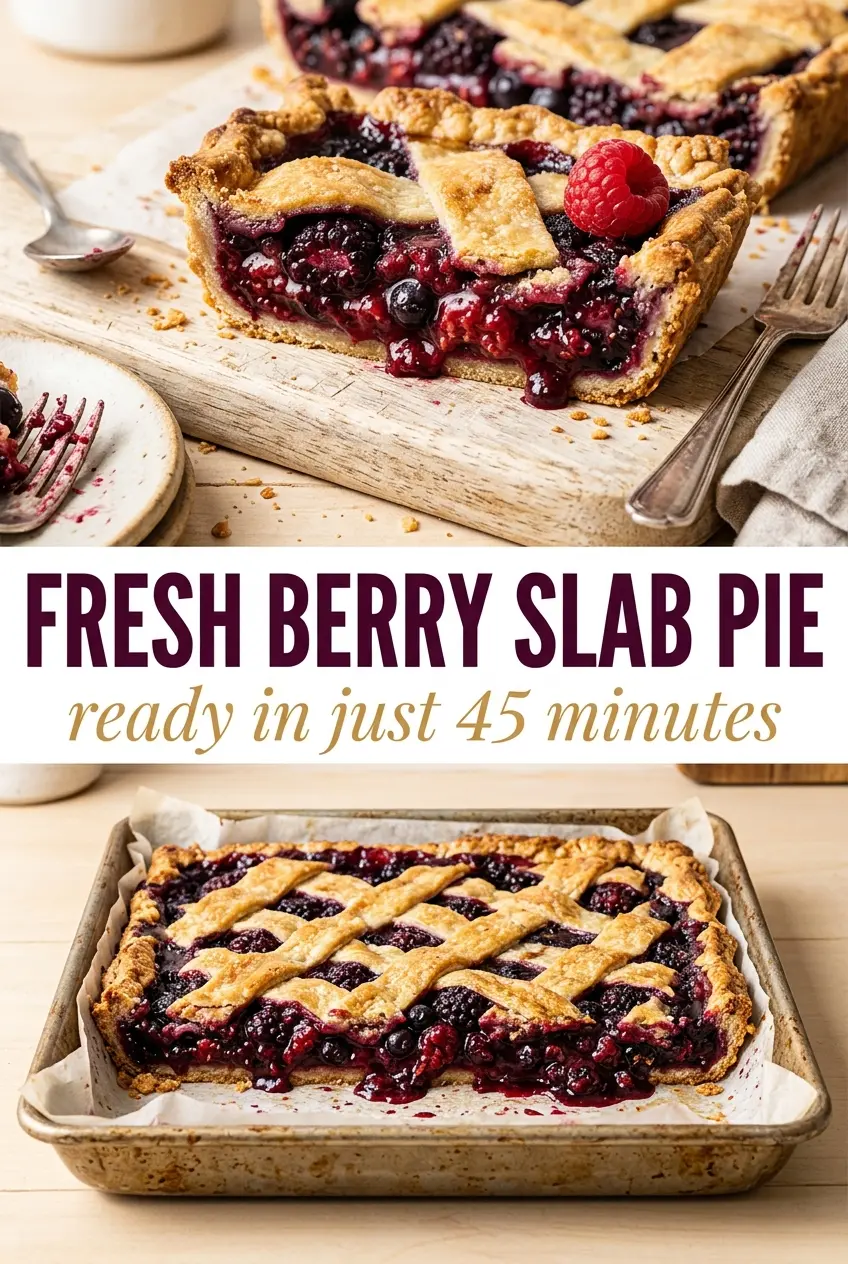
Fresh berry slab pie brings everything people love about a classic summer pie into a format that actually feeds a crowd without slicing a dozen separate wedges. The crust bakes up sturdy and crisp on the bottom, the top turns deep golden and flaky, and the filling settles into glossy, jammy pockets instead of running all over the pan. It feels generous on a serving platter, which is half the appeal.
The part that makes this version work is the balance between juicy fruit and enough thickener to hold the filling together after it cools. Strawberries carry the bulk, raspberries add sharpness, and blueberries round everything out with a little body. A quick pre-bake on the bottom crust keeps the base from going soggy, and the milk wash with a sugar sprinkle gives the top crust a bakery-style finish without any fuss.
Below, I’ll walk through the one step that keeps the bottom crust crisp, what each berry brings to the pan, and how to adapt this for different fruits if your market haul looks a little different.
The filling set up beautifully after cooling, and the bottom crust stayed crisp even under all those berries. I cut it into squares for a picnic and it held together better than I expected.
Save this fresh berry slab pie for the next potluck when you need a crisp crust, juicy filling, and easy squares that serve a crowd.
The Trick to Keeping a Slab Pie Crisp Under a Juicy Berry Filling
A slab pie gives you more surface area than a standard pie, which means more room for the crust to soften if you skip the pre-bake. That bottom layer needs a head start in the oven before the berries go in. Ten to twelve minutes is enough to set the crust and give it color without fully baking it hard.
The other part that matters is cooling. If you add a hot filling to a warm crust or cut into the pie while it’s still steaming, the juices keep moving and the crust loses its snap. Letting the pie cool for the full two hours gives the cornstarch time to thicken and the filling time to settle into clean slices.
What Each Berry Is Doing in This Pan

- Strawberries — These carry the filling and give you the biggest, softest pieces. Slice them evenly so they cook at the same pace as the other berries. If they’re large and watery, cut them smaller rather than piling them in whole.
- Raspberries — They bring brightness and help make the filling taste like mixed berries instead of just sweet fruit. They break down quickly, which is part of what gives the filling that jammy texture. Frozen raspberries work too, but add them straight from the freezer so they don’t turn mushy in the bowl.
- Blueberries — Blueberries add body and hold their shape, which keeps the filling from turning completely loose. They also soften the sharper edge of the raspberries. Fresh is best here, but frozen will work if you keep the total berry volume the same.
- Cornstarch — This is what turns all that fruit juice into a sliceable filling. Too little and the pie runs; too much and the filling can turn pasty. If you’re using especially juicy berries, stick with the full amount and let the pie cool completely before cutting.
- Refrigerated pie crusts — The shortcut works because the filling already asks for enough attention. What matters is handling the dough gently and pressing the seams together well so the top and bottom crusts bake as one. If you prefer homemade dough, use a double batch for a 15×10-inch pan.
Building the Crust, Filling, and Top So They Bake Evenly
Pressing and Pre-Baking the Bottom Layer
Unroll the first crusts and press them into the pan so the seams disappear as much as possible. The dough should sit flat against the corners without tearing, and a few small wrinkles are fine. Bake it until the surface looks set and the edges take on a pale gold color. If you leave it blonde and soft, the berry juices will soak right through once the filling goes in.
Mixing the Fruit Without Crushing It
Stir the berries with the sugar, cornstarch, and lemon juice just until everything is coated. Don’t mash the fruit while you mix. You want some berries whole and some just starting to release juice, because that gives the filling a mix of textures instead of one uniform paste. The mixture should look glossy and a little wet, not dusty with starch.
Finishing the Top Crust
Roll the remaining crust over the berries, pinch the edges tightly, and cut slits so steam can escape. If the top stays sealed, the filling can bubble aggressively and push the crust apart. Brushing with milk and sprinkling with the remaining sugar gives you a bronzed top with a little crunch. Bake until the whole surface is deep golden and you can see the filling bubbling through the cuts.
Cooling Before the First Slice
This is the part people rush, and it matters. The pie needs time for the cornstarch to finish thickening as it cools. If you cut it early, the berries slide apart and the crust loses its structure. Let it sit for two full hours before slicing, and you’ll get cleaner squares with a filling that stays put.
How to Adapt Fresh Berry Slab Pie for Different Needs
Gluten-Free Crust Swap
Use a gluten-free pie crust that rolls out well and can be pressed into a pan without cracking too much. The filling itself is naturally gluten-free, so the texture change comes almost entirely from the crust. Expect a slightly more delicate bottom, and let the pie cool fully before moving it so the crust firms up as much as it can.
Less Sugar, Sharper Berry Flavor
Drop the sugar by up to 1/4 cup if your berries are very ripe and sweet. The filling will taste brighter and more tart, but it will still thicken the same because the cornstarch is doing the structural work. Go lower than that and the pie can taste flat, especially with strawberries in the mix.
Mixed Berry Swap
Blackberries or cherries can replace part of the berry mix if that’s what you have on hand. Just keep the total fruit volume the same so the crust ratio stays balanced. Blackberries add more seed and chew, while cherries bring a deeper, almost winey note that changes the pie in a good way.
Storage and Reheating
- Refrigerator: Store covered for up to 4 days. The crust softens a little by day two, but the filling stays nicely set.
- Freezer: This pie freezes well after baking and cooling. Wrap individual slices tightly and freeze for up to 2 months; thaw in the refrigerator so the crust doesn’t go soggy from condensation.
- Reheating: Warm slices in a 300°F oven for 10 to 15 minutes. The oven brings the crust back to life better than the microwave, which turns the pastry soft and the fruit filling loose.
Answers to the Questions Worth Asking
Fresh Berry Slab Pie
Ingredients
Equipment
Method
- Preheat the oven to 450°F. Make sure the oven is fully hot before baking for the best color.
- Unroll two pie crusts and press together to fit a 15x10x1-inch pan, then place on a sheet pan and bake for 10 to 12 minutes until golden. Let cool.
- Mix the strawberries, raspberries, blueberries, 1 cup sugar, cornstarch, and lemon juice together until well combined. Stir until the cornstarch is evenly distributed.
- Spoon the berry mixture into the crust-lined pan. Distribute it evenly to the corners.
- Roll the remaining crusts into a rectangle and place over the berry mixture, then pinch the edges together and cut slits in the top. Keep the lattice-style openings spaced so steam vents.
- Brush with milk, sprinkle with the remaining sugar, and bake for 40 to 45 minutes until deep golden brown. Cool for 2 hours before slicing.