
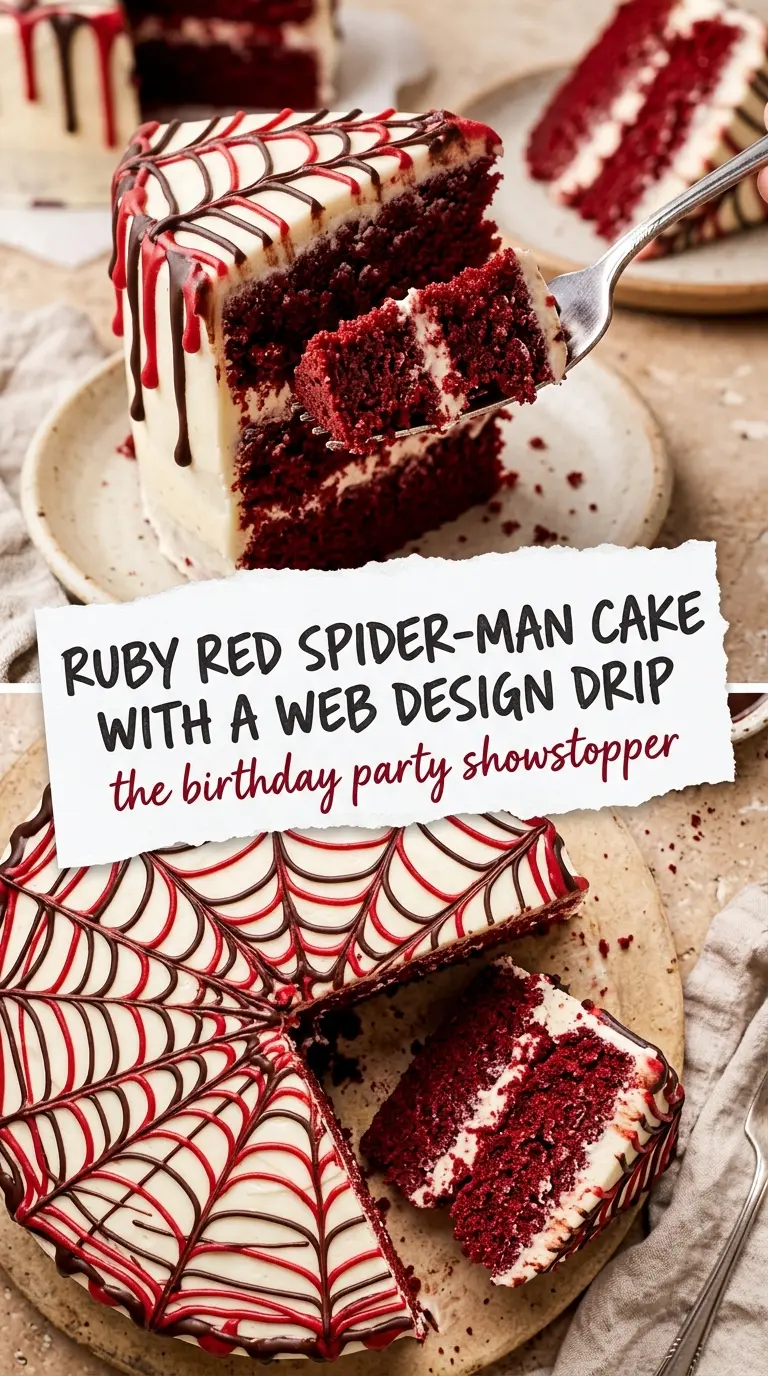
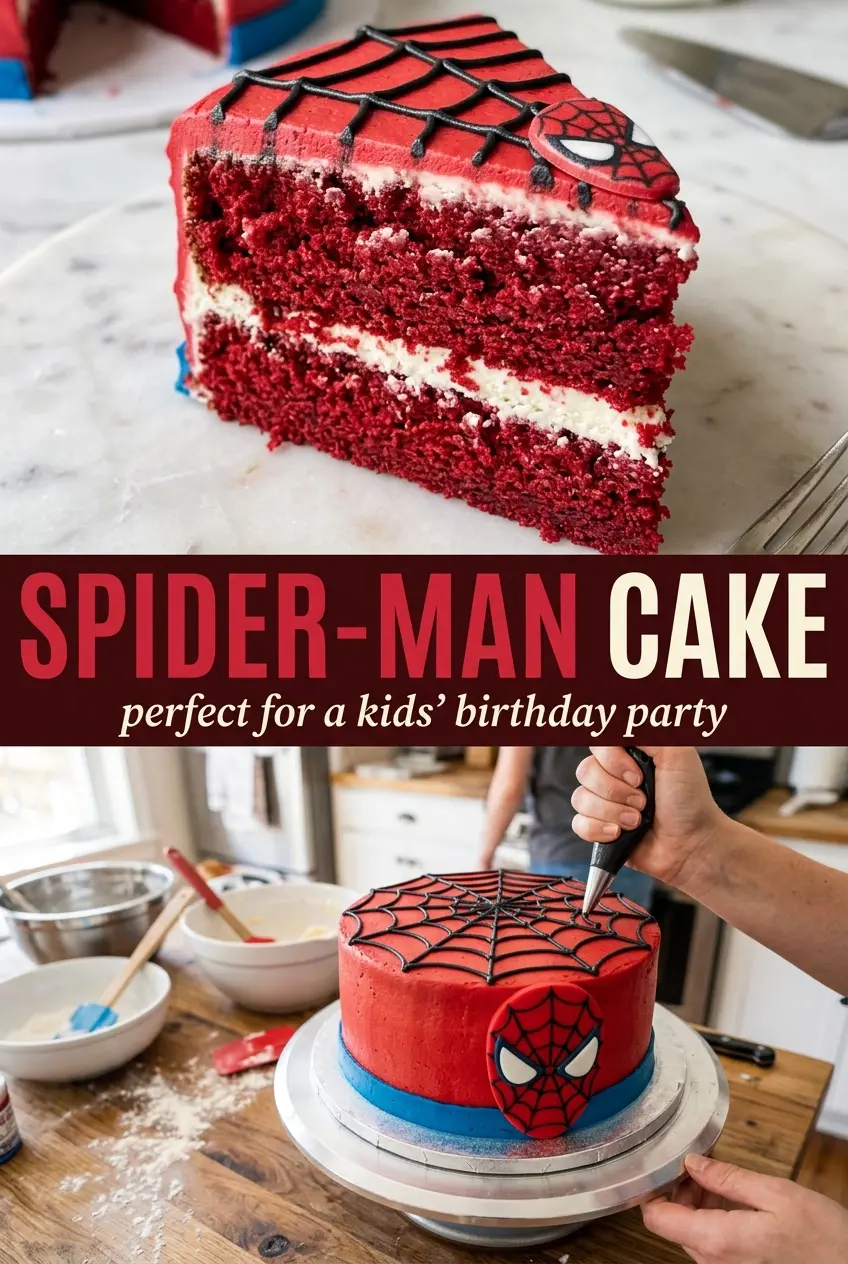
Spider-Man Cake brings the fun before the first slice even comes off the platter. The crumb stays soft and moist, the cream cheese frosting gives each layer a clean tang, and the chocolate web on top adds just enough drama to make the whole cake feel like a birthday centerpiece instead of just another frosted layer cake. It looks bold, but the method is straightforward, which is exactly what you want when the real goal is getting a celebration cake that cuts neatly and tastes as good as it looks.
What makes this version work is the balance. Buttermilk keeps the crumb tender, vegetable oil gives you a cake that stays soft even after chilling, and the red food coloring delivers that unmistakable Spider-Man look without muddying the batter. The web design is easiest when the cake is cold and the frosting has set, because warm frosting will drag the lines and blur the pattern. That little bit of patience is what turns a homemade cake into one that feels polished.
Below, I’ll walk through the part that matters most: how to keep the layers level, how to frost without pulling up crumbs, and how to pipe the web so it looks sharp instead of messy. There’s also a couple of practical swaps and storage notes, because a celebration cake should hold up until the last slice.
The cake layers baked up really moist and the cream cheese frosting held everything together perfectly. I chilled it before doing the chocolate web, and the lines stayed crisp instead of smearing.
A Spider-Man birthday cake with a clean chocolate web and soft red velvet crumb is worth pinning for the next superhero party.
The Trick to Keeping the Web Design Sharp Instead of Blurry
The chocolate web is the part that makes people pause, but it only looks clean if the cake is cold and the frosting has firmed up first. If you pipe onto a soft or warm surface, the lines sink in and lose their shape almost immediately. Chilling the frosted cake gives you a surface that behaves more like canvas than cream.
The other common mistake is using chocolate that’s too hot or too thin. Melt it until smooth, then let it sit for a minute or two so it flows cleanly from the piping bag without running like syrup. If it drips in thick blobs, it’s too cool; if it spreads on contact, it’s too warm.
What the Buttermilk, Oil, and Cream Cheese Frosting Are Doing Here
- Buttermilk — This keeps the crumb tender and gives the cake a little lift with the baking soda. If you don’t have it, use regular milk mixed with 1 tablespoon lemon juice or vinegar per cup and let it sit for 5 minutes.
- Vegetable oil — Oil is what keeps this cake soft even after it chills. Butter adds flavor, but it firms up in the fridge and can make the cake feel denser once it’s cold.
- Red food coloring — This is what gives you the bright Spider-Man look. Gel coloring gives a deeper red with less liquid, which helps keep the batter from thinning out; liquid works too, but the color will usually be lighter.
- Cream cheese frosting — The tang balances the sweet cake and gives you a stable filling between layers. If you use a softer frosting, the layers can slide when you stack them, especially if the cake is warm.
- Dark chocolate — The web design needs chocolate that sets with definition. Chocolate chips can work in a pinch, but chopped baking chocolate melts smoother and pipes with cleaner lines.
Mixing the Batter, Baking the Layers, and Assembling the Cake
Dry Ingredients First
Whisk the flour, sugar, and baking soda together until they look evenly combined. This keeps the leavener from clumping in one spot, which matters because uneven baking soda can leave bitter pockets or a coarse crumb. Use a bowl big enough to give everything room; crowded dry ingredients don’t mix evenly.
Bringing the Wet Ingredients Together
In the second bowl, whisk the eggs, buttermilk, oil, red food coloring, and vanilla until the color looks uniform. You want the batter to be fully blended before it touches the flour, because half-mixed food coloring can leave streaks instead of a consistent red crumb. Don’t overbeat here; just smooth it out.
Combining and Baking
Fold the wet mixture into the dry ingredients until the batter looks smooth and no dry flour remains. Stop as soon as it comes together, because overmixing can make the cake tight instead of soft. Divide the batter evenly between the pans and bake until the centers spring back and a toothpick comes out clean or with a few moist crumbs, not wet batter.
Cooling, Frosting, and Finishing the Web
Let the layers cool completely before you stack them. Warm cake will melt the frosting and make the whole structure slide. Once assembled, chill the cake before piping the chocolate web, then use a toothpick to sketch the lines lightly first if you want extra control; that small guide makes the design much easier to keep even.
How to Adapt This Cake for Different Party Needs
Dairy-Free Version
Swap the buttermilk for a dairy-free milk plus 1 tablespoon vinegar per cup, and use a dairy-free frosting that can hold its shape. The cake crumb will stay soft, but the frosting may be a little less tangy and slightly softer, so chilling becomes even more important before piping the web.
Gluten-Free Swap
Use a cup-for-cup gluten-free flour blend that already includes xanthan gum. The cake will still bake up tender, though it may need a few extra minutes in the oven and should be cooled fully before handling because gluten-free layers can be more delicate when warm.
Cupcake Version for a Crowd
Bake the batter in lined cupcake tins instead of layer pans for easier serving at a party. You’ll lose the big web-on-top effect, but you gain portion control and faster cooling, which is handy when you need dessert ready on a tight schedule.
Storage and Reheating
- Refrigerator: Store covered for up to 4 days. The cake stays moist, and the frosting firms up a bit, which actually helps the slices hold their shape.
- Freezer: Freeze unfrosted layers tightly wrapped for up to 2 months. Frosted cake can be frozen, but the web design may lose some sharpness when thawed.
- Reheating: This cake is best served cold or at cool room temperature, not warmed. If it’s been refrigerated, let slices sit out for 20 to 30 minutes so the frosting softens slightly and the crumb tastes tender instead of firm.
Answers to the Questions Worth Asking
Spider-Man Cake
Ingredients
Equipment
Method
- Preheat oven to 350°F and grease two cake pans.
- Whisk flour, granulated sugar, and baking soda in a bowl until evenly combined.
- In another bowl, mix eggs, buttermilk, vegetable oil, red food coloring, and vanilla extract until smooth.
- Combine wet and dry ingredients and mix until the batter is smooth and uniform.
- Divide batter between pans and bake 30–35 minutes until a toothpick comes out clean.
- Cool cakes completely before frosting and stacking.
- Stack layers and spread cream cheese frosting between layers to build the tall cake.
- Chill the frosted cake before piping the web design for cleaner lines.
- Pipe a web design on top using melted dark chocolate for web design, then use a toothpick to draw the classic spiderweb pattern before piping if needed.