
Dramatically puffed mini Dutch baby pancakes earn their place on the table because they come out with crisp, lacy edges, a custardy center, and enough height to feel a little theatrical without asking for much from you. The contrast is what keeps people coming back: the outside browns and crackles, then the middle settles into something soft, eggy, and just sweet enough to work with berries or jam.
The trick is the same one that makes full-size Dutch babies work, but it matters even more in mini pans: the pans need to be hot before the batter goes in, and the batter needs to be smooth and ready to pour the second they come out of the oven. That blast of heat is what creates the lift, and cold batter hitting a screaming-hot pan is what gives you those dramatic edges. If the pans cool down too much, the pancakes still cook, but they won’t puff the way they should.
Below, I’ve included the detail that matters most for keeping them tall, plus a few variations if you want to change the flavor or serve them to a mixed crowd. These disappear fast, so it helps to have the toppings waiting before the pans come out.
The puff on these was unbelievable, and the centers stayed soft instead of eggy in a bad way. I served them straight from the oven with berries and jam, and they were deflated halfway through breakfast but still completely gone.
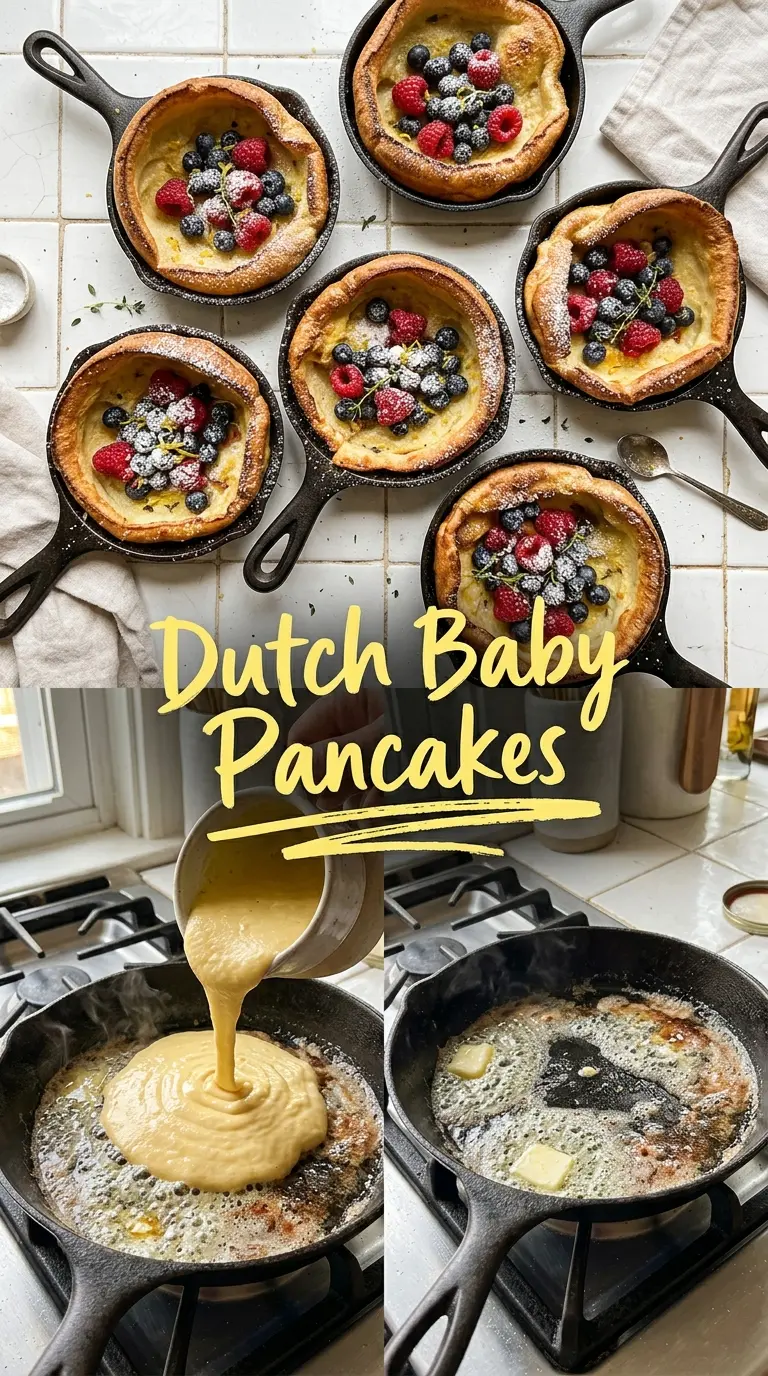
These mini Dutch baby pancakes puff up beautifully in hot pans and turn golden at the edges, so save this one for brunches that need a little wow.
The Hot Pan Is What Gives You the Puff
Mini Dutch babies fail for one reason more than any other: the pan isn’t hot enough when the batter goes in. The batter starts setting the second it hits the metal, and that sudden burst of heat traps steam fast enough to push the pancakes upward. If the pans are merely warm, you’ll still get breakfast, but you won’t get those tall, craggy edges.
The other mistake is opening the oven too soon. These pancakes need an uninterrupted bake so the structure can set before the steam escapes. Pull them when they’re deeply golden and the centers look just set; if they’re pale, they’ll collapse fast and stay a little soggy in the middle.
What Each Ingredient Is Actually Doing in This Dish
- Eggs — These give the batter its lift, structure, and that custardy center. Don’t cut them down; Dutch babies depend on egg for both puff and texture.
- Milk — Milk loosens the batter so it can spread quickly in the hot pan and rise evenly. Whole milk gives the richest result, but 2% still works well if that’s what you keep on hand.
- All-purpose flour — Just enough flour gives the pancakes body without making them heavy. If you swap in a gluten-free blend, use one that replaces flour cup for cup; rice-heavy blends can turn the texture a little brittle.
- Butter — The butter does two jobs: it prevents sticking and helps the edges fry into that crisp, lacy border. Use real butter here; margarine won’t brown the same way.
- Vanilla — This doesn’t make the pancakes taste like dessert, but it rounds out the eggy base and makes the berries taste brighter. A little goes a long way.
How to Build the Batter, Heat the Pans, and Get the Rise
Blend Until the Batter Is Completely Smooth
Blend the eggs, milk, flour, vanilla, and salt until the batter looks glossy and pourable with no flour streaks left behind. Tiny lumps won’t ruin it, but big ones can land as dense spots in the finished pancake. If your batter seems foamy, let it sit for a minute while the oven finishes heating; that helps it relax and pour evenly.
Heat the Pans Until They’re Screaming Hot
Put the mini cast-iron pans in the oven before you start the batter so they have time to heat through. When you remove them, add a small piece of butter to each pan and swirl quickly so it melts and coats the sides. Work fast here, because every second the pans sit on the counter is a second of lost lift.
Pour and Bake Without Pausing
Pour the batter into the buttered pans immediately and return them to the oven right away. The batter should hiss a little when it hits the pan; that’s what you want. Bake until the pancakes are deeply golden and puffed high around the edges, with centers that look set but still soft enough to collapse slightly when touched.
Serve the Second They Come Out
Dust them with powdered sugar and add berries, jam, or syrup while they’re still towering. Mini Dutch babies deflate quickly, and that’s normal. The texture stays excellent, but the visual drama fades, so the table should be ready before the oven timer goes off.
How to Adapt These Mini Dutch Babies for Different Toppings and Diets
Dairy-Free Version
Swap the milk for an unsweetened non-dairy milk that has some body, like oat milk. Use a dairy-free butter substitute with a high fat content for the pans, but expect a slightly less crisp edge than with real butter.
Gluten-Free Batter
Use a good 1:1 gluten-free flour blend in place of the all-purpose flour. The pancakes still puff, but the crumb is a little more delicate, so serve them straight from the pan rather than trying to stack them.
Make It More Dessert-Like
Add a little cinnamon or citrus zest to the batter and use fruit compote instead of plain berries. That pushes the flavor into brunch-dessert territory without changing the structure of the pancakes.
Storage and Reheating
- Refrigerator: Store leftovers in an airtight container for up to 2 days. They lose their dramatic puff, but the texture stays pleasant.
- Freezer: Freeze only if you plan to use them for a quick breakfast later. Wrap tightly and freeze for up to 1 month, then reheat from frozen.
- Reheating: Warm in a 350°F oven until hot through. The oven keeps the edges from turning rubbery; the microwave softens them too much and flattens what’s left of the texture.
Answers to the Questions Worth Asking

Mini Dutch Baby Pancakes
Ingredients
Equipment
Method
- Preheat oven to 425F and place mini cast-iron pans inside to heat through.
- Blend eggs, milk, all-purpose flour, vanilla, and salt until smooth.
- Carefully remove hot pans and add about 1/2 tsp butter to each, then swirl to coat the surfaces.
- Pour batter in quickly, filling each pan, and return immediately to the oven.
- Bake 12-15 minutes at 425F until dramatically puffed and golden around the edges with visible golden lacey rims.
- Serve immediately with powdered sugar, fresh berries, and jam for dipping or topping.