
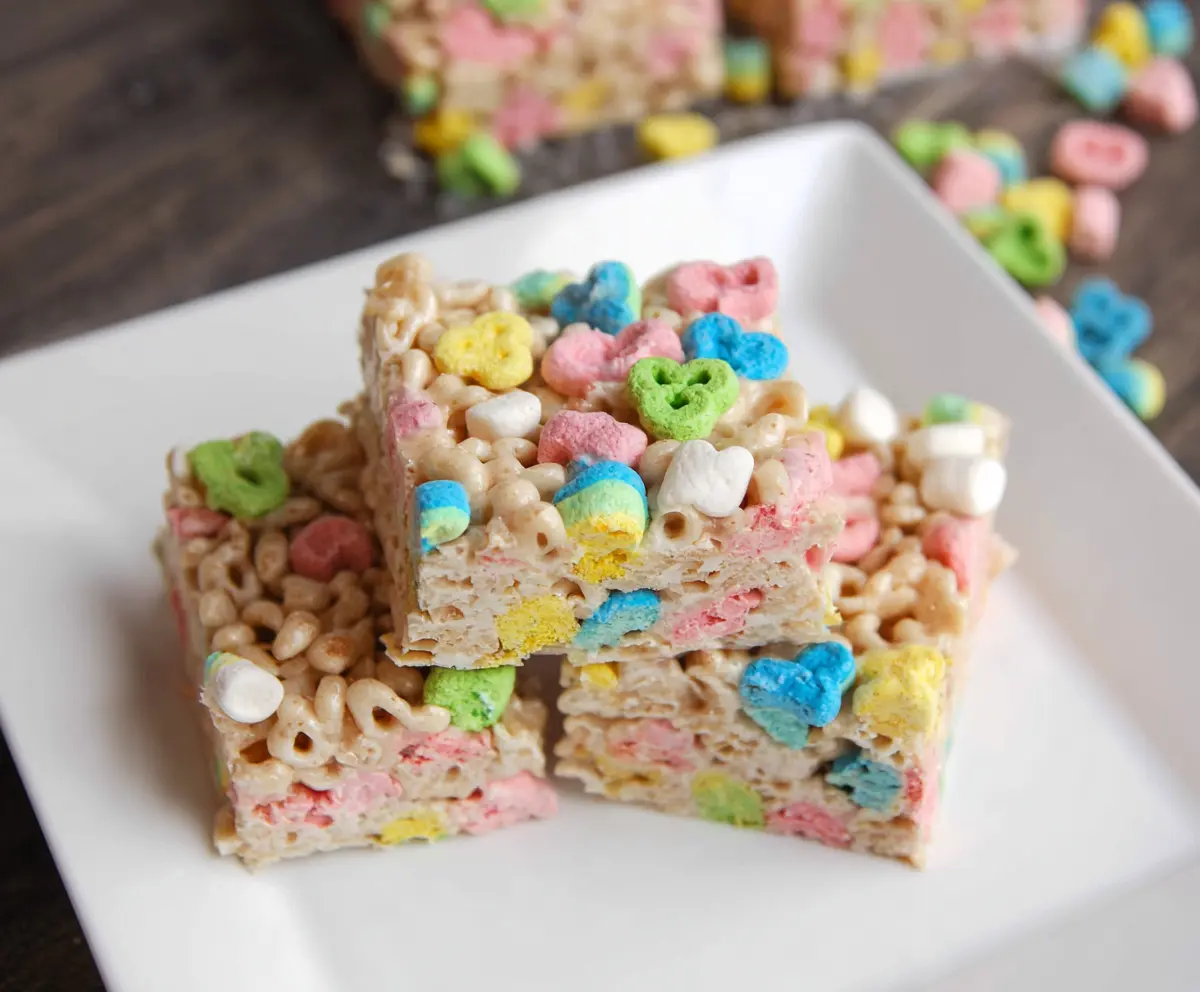
Lucky Charms Marshmallow Treat Bars are a fun and colorful twist on the classic marshmallow treat. They combine gooey melted marshmallows and crispy rice cereal with the bright, crunchy magic of Lucky Charms marshmallows. These bars are sweet, chewy, and packed with little bursts of rainbow color that make every bite super cheerful.
I love making these bars because they’re so easy and perfect for sharing at parties or just as a quick sweet snack. The marshmallow coating holds everything together, making a soft, chewy texture that kids and adults both can’t resist. Plus, I always enjoy sneaking a few of those marshmallow shapes — they’re like little edible treasures that make baking more fun.
My favorite way to enjoy these treat bars is freshly made, while they’re still slightly warm and gooey. But they also pack up well for school lunches or quick after-school treats. Whenever I bring these bars to a get-together, they seem to disappear fast, so I always make extra. They’re a simple way to add some fun and magic to any day!
Key Ingredients & Substitutions
Lucky Charms Cereal: This is the star in the recipe, adding both crunch and colorful marshmallows. If you can’t find it, any similar marshmallow cereal works well. You can also mix regular cereals with marshmallows for a DIY version.
Mini Marshmallows: They melt quickly and give the treats their sticky texture. You can use regular marshmallows but cut them into smaller pieces for faster melting. Vegan marshmallows are a good substitute too.
Butter: Butter adds richness and helps melt the marshmallows smoothly. You can use margarine or coconut oil if you prefer a dairy-free option, though this may change the flavor slightly.
Vanilla Extract: This is optional but adds a nice hint of flavor. If you don’t have any, it’s okay to skip it; the bars will still taste great.
How Do I Get the Marshmallows to Melt Smoothly Without Burning?
Melting marshmallows without burning them can be tricky. Here’s how to do it right:
- Use low heat to melt butter first, then add marshmallows gradually to avoid high heat that burns sugar.
- Stir constantly with a heat-safe spatula to keep the mixture smooth and prevent sticking to the bottom.
- Remove from heat as soon as marshmallows are fully melted—don’t wait until the mixture thickens too much or it might get tough.
Patience is key! Low and slow heat with constant stirring helps you get that perfect gooey base for your treat bars.
Equipment You’ll Need
- Large saucepan – I recommend one with a heavy bottom to prevent the marshmallows from burning as they melt.
- Spatula or wooden spoon – makes it easy to stir everything smoothly and get all the marshmallows melted thoroughly.
- 9×13-inch baking dish – perfect size for spreading the mixture evenly into bars.
- Non-stick spray or butter – helps prevent sticking and makes cleanup easier.
- Measuring cups – for precision with the cereal and marshmallows.
Flavor Variations & Add-Ins
- Swap out Lucky Charms for Cocoa Puffs or Froot Loops to change the flavor and color palette.
- Mix in ½ cup of mini chocolate chips or sprinkles for extra sweetness and decoration.
- Use vanilla or almond extract instead of plain vanilla for a different aroma.
- Stir in chopped nuts or shredded coconut for added crunch and texture.
Lucky Charms Marshmallow Treat Bars
Ingredients You’ll Need:
- 6 cups Lucky Charms cereal
- 4 cups mini marshmallows (or about one 10 oz bag)
- 3 tablespoons unsalted butter
- 1 teaspoon vanilla extract (optional)
- Non-stick cooking spray or butter (for greasing the pan)
How Much Time Will You Need?
This recipe takes about 10 minutes of active prep and cooking time, plus around 1 hour to let the bars cool and set before cutting and serving.
Step-by-Step Instructions:
1. Prepare Your Pan:
Start by lightly spraying a 9×13-inch baking dish with non-stick cooking spray or greasing it with butter. This will help your treat bars come out easily later. Set the pan aside.
2. Melt Butter and Marshmallows:
In a large pot or saucepan, melt the butter over low heat. Add the mini marshmallows and stir constantly until they’re completely melted and the mixture is smooth. Be sure to keep the heat low and stir carefully to avoid burning.
3. Mix in Vanilla Extract:
Remove the pot from heat and, if you like, stir in the teaspoon of vanilla extract for a little extra flavor. This step is optional but adds nice warmth to the bars.
4. Combine Cereal and Marshmallow Mixture:
Pour the Lucky Charms cereal into the pot with the melted marshmallow mixture. Gently fold everything together until all the cereal is evenly coated with the gooey marshmallow.
5. Press Into Pan and Cool:
Immediately transfer the mixture into your prepared baking dish. Using a buttered spatula or a piece of wax paper, press the mixture firmly and evenly into the pan to create a smooth surface.
6. Let Set:
Allow the bars to cool and set at room temperature for at least 1 hour. This will help them firm up and become easier to cut.
7. Cut and Serve:
Once set, cut the treats into squares or bars. Now you’re ready to enjoy your colorful and sweet Lucky Charms Marshmallow Treat Bars!
Can I Use Frozen Marshmallows for This Recipe?
It’s best to use fresh marshmallows for melting, but if you only have frozen ones, thaw them completely at room temperature before using. This helps them melt evenly and prevents lumps.
How Should I Store Leftover Lucky Charms Treat Bars?
Store leftovers in an airtight container at room temperature for up to 3 days to keep them fresh and chewy. Avoid refrigerating as this can make them hard.
Can I Make These Treat Bars Ahead of Time?
Yes! Prepare the bars and let them set, then cover and store at room temperature. They’re great for making a day ahead for parties or snacks.
What Can I Use Instead of Butter?
You can substitute butter with coconut oil or margarine for a dairy-free option. Keep in mind this might slightly alter the flavor and texture.