
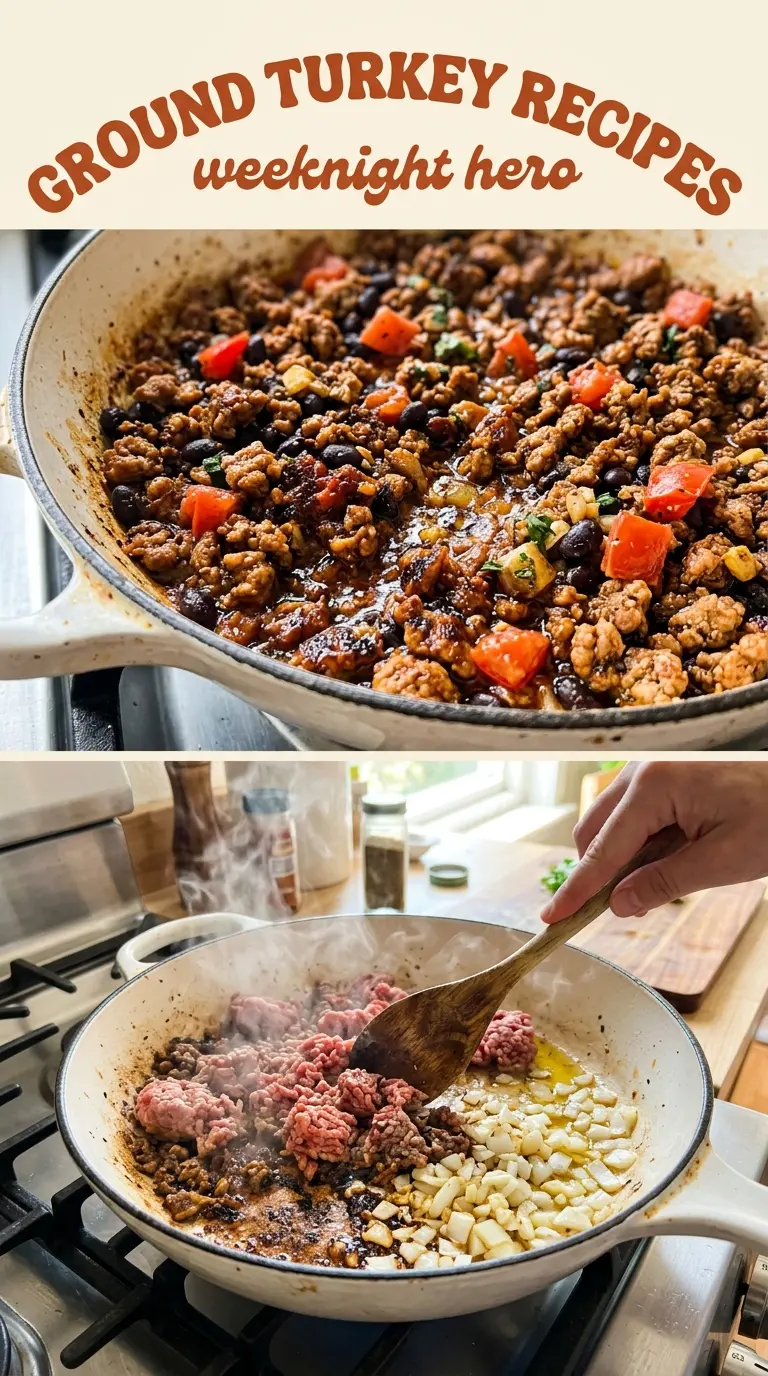
Smoky ground turkey with onions, garlic, and a spoonful of beans or tomatoes is the kind of skillet dinner that earns repeat status fast. It’s lean, but it doesn’t eat lean. The cumin and smoked paprika give it that deep, savory backbone you usually expect from a longer-cooked filling, and the short simmer at the end pulls everything together into a spoonable, taco-ready mixture.
The trick is treating turkey like the delicate meat it is. You want to brown it enough to build flavor, but not cook it so hard that it turns dry and crumbly. A little olive oil helps, and the onion-garlic base gives the pan some softness before the spices go in. Black beans make it heartier and add a little body; diced tomatoes keep it looser and brighter. Both work, but they change the finish in a noticeable way.
Below, I’m walking through the part that matters most: how to keep the turkey juicy, when to add the spices so they don’t taste flat, and which serving style makes this filling work hardest on a weeknight.
The seasoning bloomed perfectly and the turkey stayed juicy instead of dry. I used the black beans and served it in lettuce cups, and even my husband went back for seconds.
Ground turkey taco filling with smoky cumin and paprika is worth pinning for fast tacos, lettuce cups, or grain bowls any night of the week.
The Reason Ground Turkey Stays Juicy Instead of Drying Out
Ground turkey goes dry when it’s treated like beef. It doesn’t have the same fat cushion, so the goal is flavor first, overcooking last. Start with the onion in oil so the pan has some moisture and sweetness before the turkey hits it. Then break the meat up and cook it just until the pink is gone and the texture looks sandy and cooked through, not tight and spongy.
The other thing that matters is when you season it. Spices taste flatter if they go in at the very end, but they can scorch if they’re thrown into a dry pan too early. This recipe gives the turkey a minute to pick up some color, then adds cumin, smoked paprika, and chili powder so the heat wakes them up without burning them.
If your turkey ends up dry anyway, it’s usually because the pan was too hot or the simmer went too long without any extra moisture. A splash of broth fixes that fast.
What Each Ingredient Is Actually Doing in This Skillet
- Lean ground turkey — This is the base, so quality matters more than with a heavily sauced dish. Look for 93% lean if you can; it stays more tender and tastes less dry than extra-lean turkey. If you only have very lean turkey, the olive oil and a small splash of broth become more important.
- Yellow onion — Onion gives the skillet a sweet, savory foundation that turkey needs. Dice it small so it softens quickly and almost melts into the filling. If you skip this or rush it, the dish tastes flatter and more one-note.
- Garlic — Garlic doesn’t need much time here. One minute is enough to take off the raw edge and keep it from turning bitter. If your garlic starts browning hard, lower the heat before the turkey goes in.
- Cumin, smoked paprika, and chili powder — This trio does the heavy lifting. Cumin brings earthiness, smoked paprika adds depth, and chili powder gives warmth without making the filling spicy-hot. If you only have regular paprika, the flavor will still work, but it’ll lose that smoky finish.
- Black beans or diced tomatoes — Beans make the mixture thicker and more filling, which is great for bowls or taco shells. Tomatoes loosen the skillet and give it a brighter, saucier feel. Either one can carry the dish, but they change the texture enough that you’ll notice the difference right away.
- Olive oil — Turkey needs a little fat to help it brown and keep the spices from sticking to a dry pan. You don’t need much, but the tablespoon matters here. If you’re using a nonstick skillet and very lean turkey, don’t skip it.
The 20 Minutes That Turn Turkey Into Dinner
Softening the Onion First
Warm the olive oil in a large skillet over medium-high heat, then add the diced onion and let it cook until it turns soft and translucent, about 3 minutes. You want the edges just starting to look glossy and relaxed, not browned hard. This gives the pan a sweet base and keeps the turkey from cooking on a dry surface. If the onion starts to color too fast, lower the heat before adding garlic.
Cooking the Garlic Without Burning It
Add the garlic and cook for about 1 minute, just until fragrant. At this point the smell should go from sharp to rounded and savory. Garlic burns fast in a hot skillet, and once it’s bitter, you taste it in the final dish. If the pan looks dry, the turkey can go in right after the garlic so nothing sits long enough to scorch.
Breaking Up and Browning the Turkey
Add the ground turkey and use a spoon or spatula to break it into small pieces as it cooks. Let it sit for a moment between stirs so it can pick up a little color before you keep moving it around. The meat should lose all pinkness and look evenly cooked, with some slightly browned bits around the edges. If you stir constantly from the start, the turkey turns pale and steamed instead of savory.
Blooming the Spices and Finishing the Simmer
Stir in the cumin, smoked paprika, chili powder, salt, and pepper, then add the beans or tomatoes. Let everything simmer for about 8 minutes until the mixture thickens slightly and the flavors settle together. This is the point where the filling should look juicy but not soupy, with the turkey coated rather than floating. If it looks dry before the simmer is done, add a splash of broth and stir it in.
Three Ways to Make This Turkey Work for Your Table
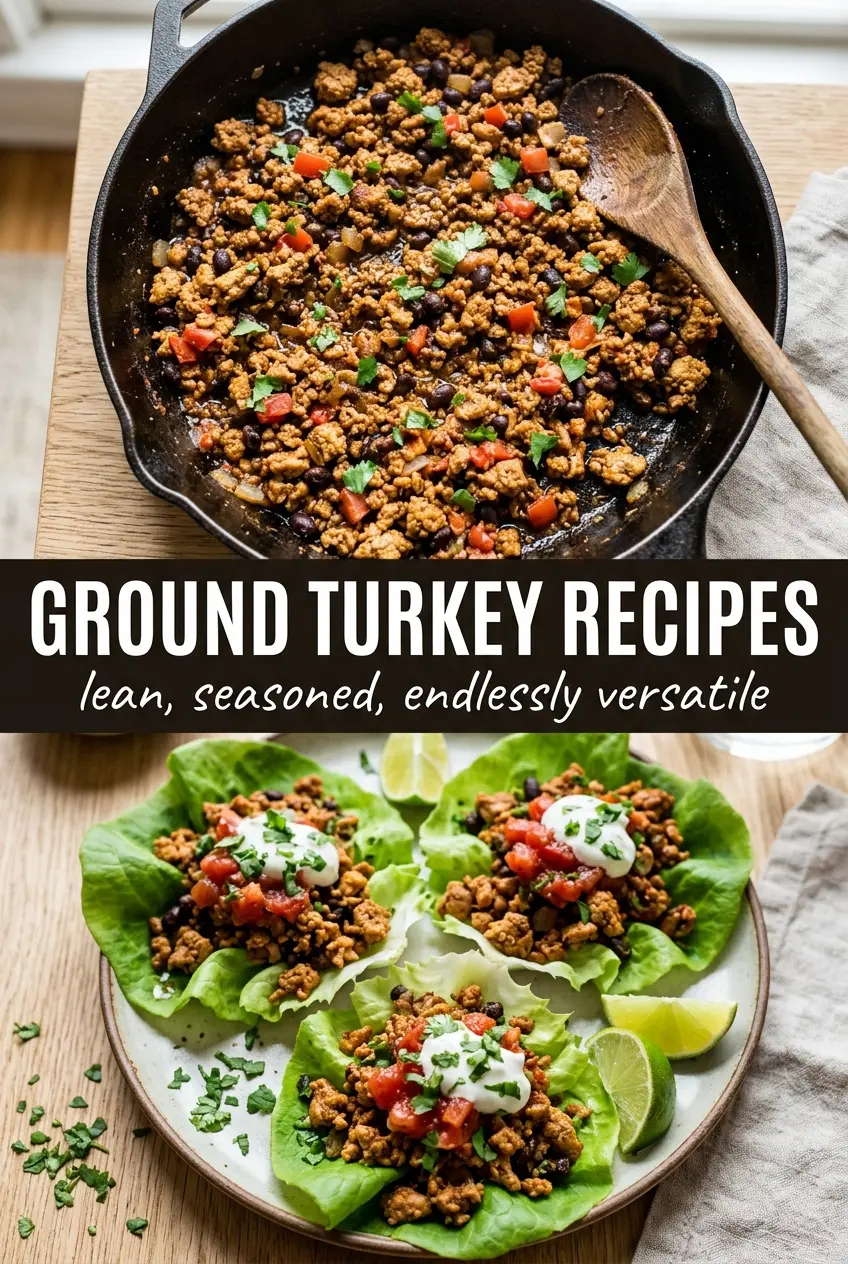
Taco Night Version
Spoon the filling into taco shells and finish with something crisp, like lettuce, shredded cabbage, or diced onion. The turkey mixture is savory enough to stand on its own, so you don’t need a heavy sauce. If you want a little more richness, add avocado or a spoonful of sour cream on top.
Lettuce Cup Version
Use crisp lettuce leaves for the lightest, fastest serving option. This works best if the turkey mixture is on the thicker side, so drain off excess liquid if you used tomatoes. The result is fresh, crunchy, and clean enough for lunch without feeling skimpy.
Gluten-Free Grain Bowl
Serve the turkey over rice, quinoa, or roasted potatoes for a bowl that eats like a full meal. If you’re keeping it gluten-free, just check your broth if you add any. The beans help make the bowl hearty, and a squeeze of lime at the end wakes everything up.
Storage and Reheating
- Refrigerator: Store in an airtight container for up to 4 days. The spices deepen a bit overnight, and the mixture usually thickens as it chills.
- Freezer: It freezes well for up to 2 months. Cool it completely first, then portion it into freezer bags or containers so it thaws evenly.
- Reheating: Warm it gently in a skillet over medium-low heat with a splash of water or broth. Microwaving works too, but stop and stir halfway through so the turkey doesn’t dry out at the edges.
The Things That Trip People Up With This Dish
Ground Turkey Recipes
Ingredients
Equipment
Method
- Heat olive oil in a large skillet over medium-high heat until shimmering, about 1 minute (visual cue: oil moves easily across the pan).
- Sauté diced yellow onion for 3 minutes until softened (visual cue: pieces look translucent). Add minced garlic and cook for 1 minute (visual cue: fragrant aroma, not browned).
- Add lean ground turkey and break it up with a spoon; cook until no pink remains, about 8 minutes (visual cue: meat turns fully brown with no red spots).
- Sprinkle in ground cumin, smoked paprika, chili powder, salt, and cracked black pepper, then stir for 30 seconds (visual cue: spices look evenly distributed and slightly toasted).
- Add black beans or diced tomatoes, stir, and simmer for 8 minutes until slightly thickened (visual cue: sauce clings more to the turkey).
- Serve the turkey mixture in taco shells, lettuce cups, grain bowls, or stuffed peppers (visual cue: filling mounded hot in the chosen vessel).