
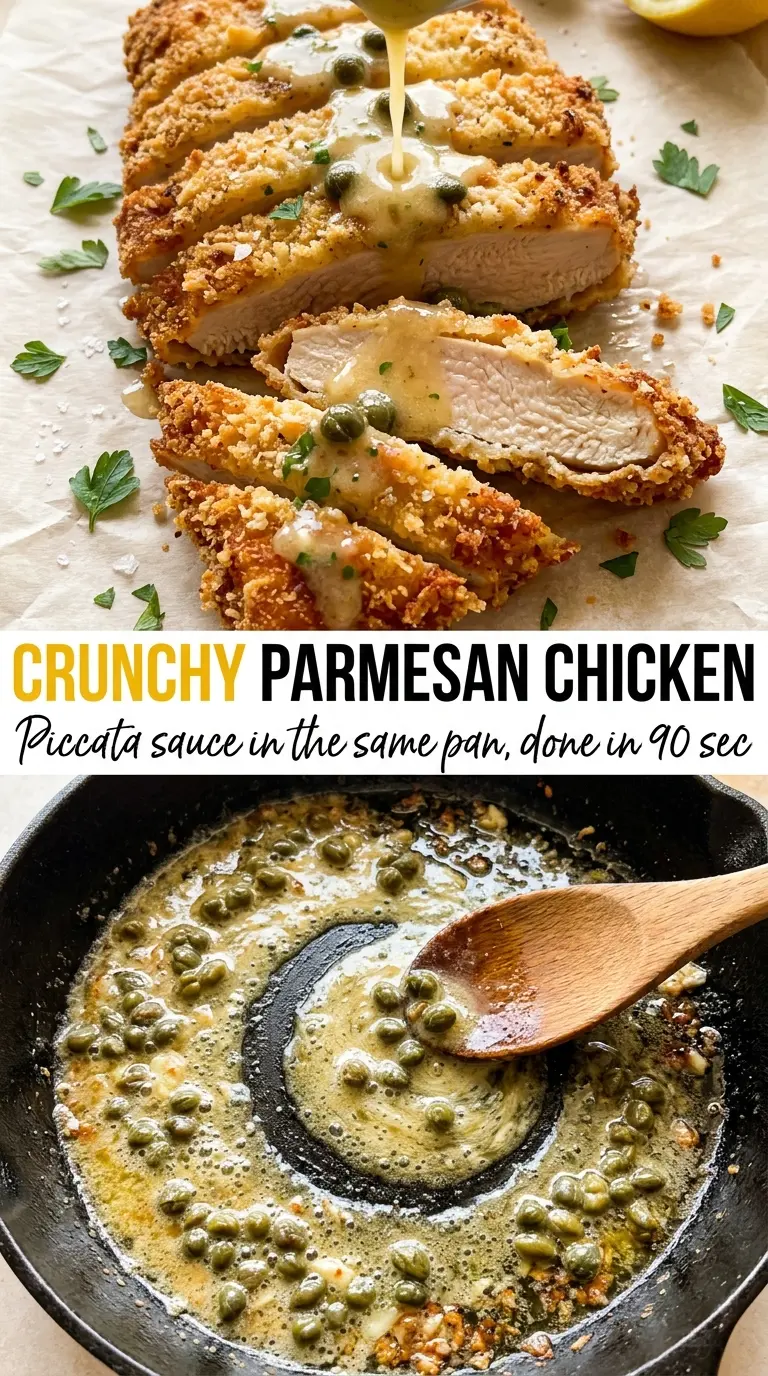
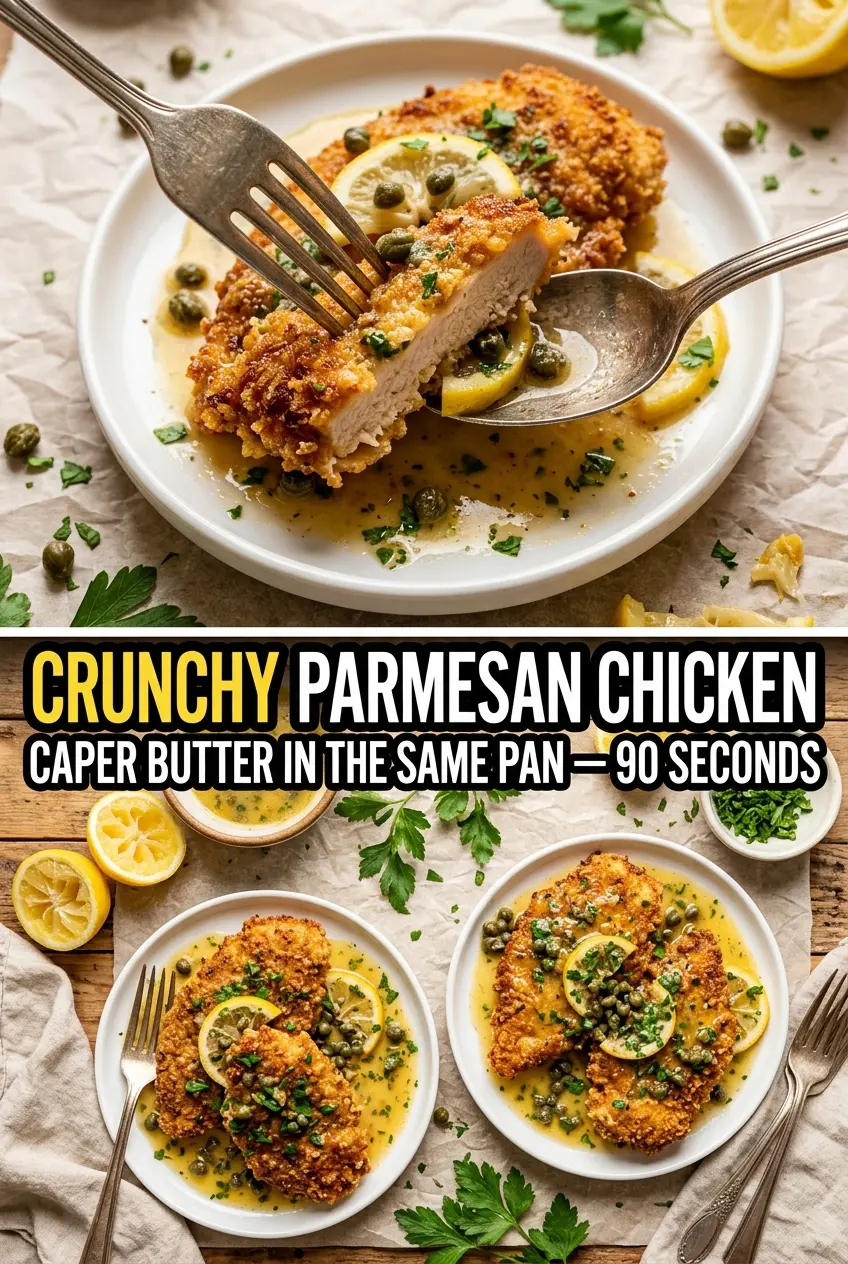
Crunchy Parmesan chicken earns its place in the rotation because the crust stays shattery under your fork, the chicken stays juicy inside, and the lemon-caper butter turns the whole pan into something that tastes far more worked-on than it is. The breading isn’t just there for crunch; the Parmesan melts into the panko as it sears, giving you a savory crust that browns fast and holds onto the sauce instead of going limp.
The trick is in the thin, even chicken and the firm press into the breadcrumb mixture. Pounding the breasts to the same thickness keeps the meat from drying out before the crust finishes, and freshly grated Parmesan gives you a better melt and a more pronounced salty edge than the pre-grated stuff. The sauce matters too: capers, lemon juice, and the browned bits left in the skillet turn into a quick pan sauce that tastes bright and rich at the same time.
Below, you’ll find the exact order that keeps the crust crisp, the pan hot enough for a deep golden sear, and the sauce smooth instead of greasy. There’s also a practical note on substitutions, because this dish still works if you need to adjust for what’s in your kitchen.
The crust came out super crisp and the lemon-caper butter picked up all those browned bits from the skillet. I’ve made it twice now, and the chicken stayed juicy even after baking.
Save this Crunchy Parmesan chicken for the nights when you want a crisp crust, a bright lemon-caper finish, and one skillet doing the heavy lifting.
The Part That Keeps the Crust Crisp Instead of Soggy
The biggest mistake with breaded chicken is rushing from the pan to the sauce before the crust has set. When that happens, the steam from the chicken softens the coating and you lose the contrast that makes this dish worth making. Here, the chicken gets a hard sear first, then a short bake in the oven to finish the center without burning the Parmesan on the outside.
The other thing that matters is pressing the breading on firmly. Loose crumbs fall off in the skillet and leave you with a patchy crust. A tight coating holds together, browns evenly, and gives the lemon-caper butter something to cling to instead of sliding right off.
- Even thickness matters — Pound the chicken to about 1/2 inch so it cooks through at the same pace the crust browns. Thick spots force you to overcook the thinner parts.
- Parmesan belongs in the breading — It browns faster than breadcrumbs alone and adds salt, depth, and a little extra crunch.
- Don’t crowd the skillet — The coating needs contact with the pan. If the chicken is packed in tightly, it steams and the crust turns blotchy.
What Each Ingredient Is Actually Doing in This Dish
- Chicken breasts — Pounding them thin is what keeps this from drying out before the crust finishes. If you use cutlets instead, skip the pounding and move straight to seasoning.
- Panko — This is the crunch. Regular breadcrumbs work in a pinch, but they pack tighter and give you a denser, less crisp crust.
- Freshly grated Parmesan — Pre-grated cheese won’t melt and brown the same way. Fresh Parmesan helps the breading turn nutty and crisp instead of dusty.
- Eggs — They’re the glue. A thin, even egg coating helps the panko-Parmesan mixture stick where it should.
- Olive oil — You need enough fat to fry the crust lightly, not shallow-pool the chicken. Too little oil leaves pale spots; too much softens the breading.
- Capers and lemon juice — They cut through the richness and pull the pan drippings into a sharp, salty sauce. If you skip them, the dish loses its lift.
Building the Crust, Then Finishing the Chicken Without Losing the Crunch
Pound, Season, and Set Up Your Dredging Line
Lay the chicken between sheets of plastic or parchment and pound it to an even thickness. Season both sides before you start breading so the meat itself tastes good, not just the coating. Set up the flour, egg, and breadcrumb mixture in separate shallow dishes so you can move cleanly through the process without clumping everything onto one hand.
Press the Coating On Like You Mean It
Dust the chicken in flour first, then dip it in egg, then press it into the panko-Parmesan mixture. The flour helps the egg grab, and the egg helps the crumbs stick. If the coating looks patchy, go back and press more crumbs onto the bare spots instead of trying to fix it once it’s in the skillet.
Sear Until the Edges Go Deep Gold
Heat the oil until it shimmers, then add the chicken and leave it alone until the bottom turns deeply golden before flipping. If you move it too soon, the crust tears and stays pale where it was in contact with the pan. You’re looking for a crisp, set crust that releases without resistance.
Finish in the Oven, Not the Pan
Once both sides are browned, move the skillet to the oven and let the chicken finish gently. That keeps the breading from over-browning while the center cooks through. Pull it when the thickest part is cooked and the juices run clear, then rest it for a few minutes so the coating stays on the chicken instead of sliding off.
Use the Same Skillet for the Sauce
Melt the butter in the hot pan, then add the capers and lemon juice and swirl everything together. The browned bits from the chicken dissolve into the butter and turn the sauce savory in a way you can’t fake with a fresh pan. If the pan looks too dry, a small splash of water helps lift the drippings without thinning the sauce into nothing.
How to Adapt This for a Different Pan, a Different Diet, or a Bigger Batch
Gluten-Free Crunchy Parmesan Chicken
Swap the flour for a gluten-free all-purpose blend and use certified gluten-free panko. The texture stays crisp, though the crust may brown a little faster, so watch the skillet closely near the end of the sear.
Dairy-Free Version
Skip the Parmesan in the breading and add 2 to 3 tablespoons nutritional yeast plus an extra pinch of salt. You’ll lose the sharp, nutty bite of real Parmesan, but the crust still gets good browning and a savory finish.
Chicken Cutlets Instead of Whole Breasts
Cutlets cook a little faster and give you more even browning, which is handy if you want a quicker dinner. They’re thinner, though, so shorten the oven time and start checking for doneness a few minutes early.
Storage and Reheating
- Refrigerator: Store the chicken and sauce separately for up to 3 days. The crust softens a little, but it still holds up well.
- Freezer: The breaded chicken freezes better before saucing. Freeze cooked pieces on a tray, then store airtight for up to 2 months. The sauce is best made fresh.
- Reheating: Warm the chicken on a rack in a 375°F oven until hot. The oven keeps the crust from steaming the way a microwave does. Reheat the sauce gently in a small pan and spoon it on after the chicken is hot.
The Things That Trip People Up With This Dish
Crunchy Parmesan Chicken
Ingredients
Equipment
Method
- Pound the boneless skinless chicken breasts to about 1/2-inch thickness, then season with salt and pepper.
- Set up a dredging station with all-purpose flour, beaten large eggs, and a combined mix of panko breadcrumbs, freshly grated Parmesan, garlic powder, Italian seasoning, plus salt and pepper.
- Dredge each chicken cutlet in all-purpose flour, shaking off excess.
- Dip the floured chicken into the beaten large eggs, letting excess drip back into the pan.
- Press into the panko breadcrumbs + Parmesan + spices until fully coated for an even, crunchy crust.
- Heat olive oil in an oven-safe skillet and sear the cutlets 3-4 minutes per side until deep golden.
- Bake at 400°F for 8-10 minutes, until the chicken is cooked through and the crust is crisp.
- Rest the chicken for 3 minutes while you keep the skillet on the heat.
- Melt butter in the same skillet, add capers and lemon juice, and swirl for 1 minute.
- Pour the lemon-caper butter sauce over the chicken.
- Garnish with parsley and serve immediately.