
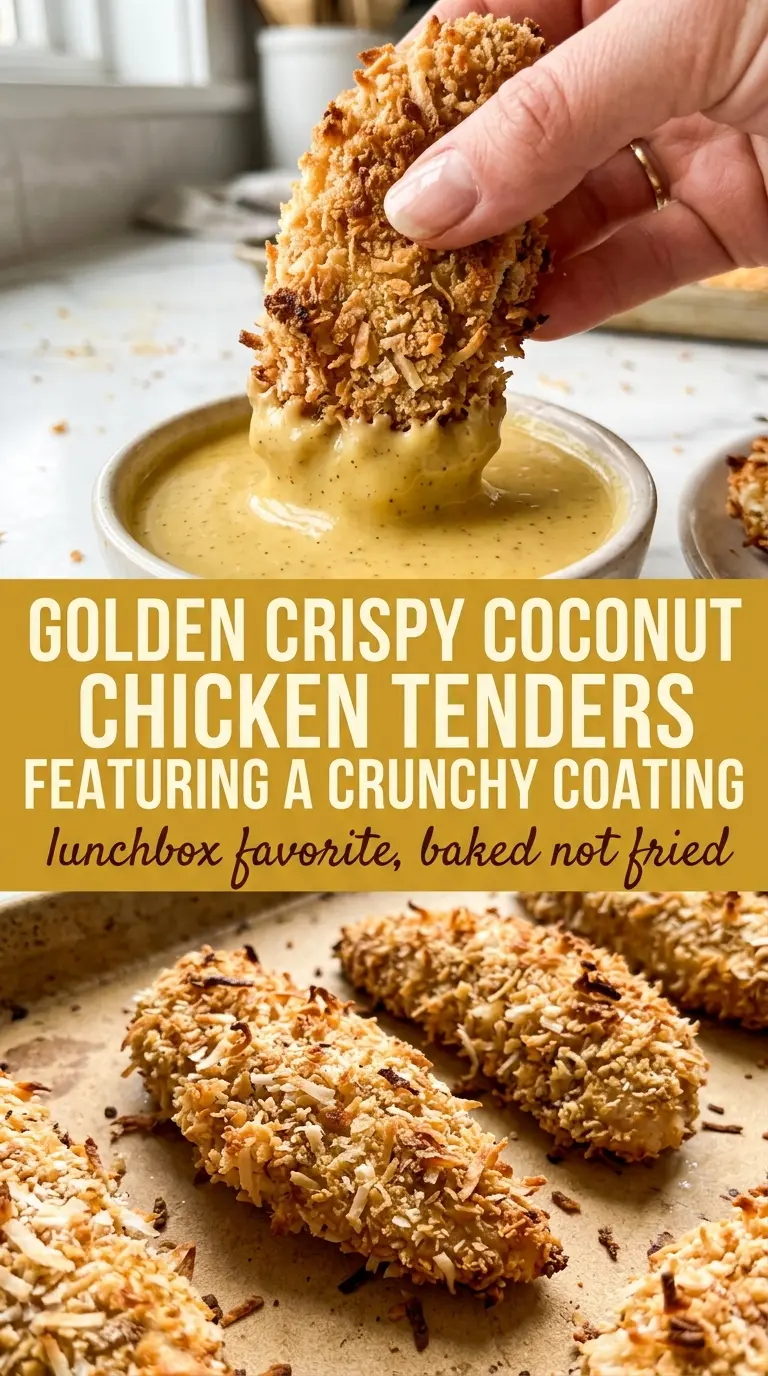
Crispy coconut chicken tenders bring the kind of crunch that makes people reach for a second piece before they’ve finished the first. The coating bakes up deep golden and shattery at the edges, with sweet coconut and toasted panko working together instead of fighting each other. The chicken stays juicy because the tenders cook fast, which means you get a crisp coating without drying out the meat underneath.
The trick here is a three-part breading station that gives the coating something to grip. Flour dries the surface just enough for the egg to cling, and the egg gives the coconut-panko mixture a tacky base so it bakes into one sturdy crust instead of flaking off onto the pan. Pressing the coating on firmly matters more than people think, especially with coconut, because those larger pieces need extra contact to stay put.
Below you’ll find the exact way I keep the coating crisp in the oven, plus a few smart swaps if you need to work with what’s already in the pantry.
The coconut stayed on beautifully and the tenders came out crisp even after a few minutes on the plate. My kids dipped them in honey mustard and there wasn’t a crumb left.
Like this crispy coconut chicken? Save it to Pinterest for the nights when you want a crunchy baked dinner with almost no cleanup.
The Secret to Getting Coconut to Stick Instead of Sliding Off
Coatings fail most often at the same two points: the chicken is too wet at the flour stage, or the crumb layer never gets pressed on hard enough. Coconut adds another wrinkle because it’s lighter and flakier than plain breadcrumbs, so it needs firm contact with the egg layer and a little patience when you press it in.
Bread the tenders in the order given and don’t rush the handoff from flour to egg to coconut-panko. The flour should look dusty, not pastey. The egg should coat in a thin, even sheen. When the final coating goes on, use your fingers to press it into every side so the chicken carries a compact crust into the oven instead of a loose topping that falls away on the tray.
What Each Ingredient Is Actually Doing in This Dish
- Chicken tenders — Tenders cook evenly and stay juicy in the short bake time. If you use chicken breasts, slice them into even strips so they finish at the same pace.
- Shredded sweetened coconut — Sweetened coconut browns well and gives the tenders their distinctive crunch. Unsweetened coconut works, but the result is less caramelized and a little drier.
- Panko breadcrumbs — Panko keeps the coating light instead of dense. Regular breadcrumbs work in a pinch, but the crust won’t be as crisp.
- Flour — The flour creates the dry base that lets the egg adhere. All-purpose flour is the right choice here; there’s no advantage to anything fancier.
- Eggs — Eggs bind the coating to the chicken and help it bake into one shell. Beat them well so the yolk doesn’t streak and leave uneven patches.
- Garlic powder — Just enough savory depth to keep the coconut from tasting one-note. Don’t swap in fresh garlic; it can scorch before the chicken is done.
How to Bake Them So the Coating Stays Crisp
Setting Up the Breading Station
Line up the flour, eggs, and coconut-panko in separate shallow bowls before you touch the chicken. That keeps your hands from turning into breading clumps, which is usually what causes patchy coating. Season the flour, not the coconut mixture, so the spice ends up right against the meat instead of sitting only on the surface.
Coating Each Tender Evenly
Lightly dredge the chicken in flour first, then tap off the excess so the egg can make contact without turning gummy. Dip it into the egg long enough to coat every side, then press it firmly into the coconut and panko mixture. If the coating looks shaggy or loose, press again — that extra minute is what keeps the crust intact after baking.
Baking to a Deep Golden Finish
Arrange the tenders on parchment so they aren’t touching, then bake at 425°F until the crust is golden and the chicken hits 165°F in the thickest piece. Flip halfway through so both sides dry and brown instead of leaving one side pale and soft. If the bottom is still blond at the end, give them another minute or two; coconut browns fast, but it still needs enough time to toast through.
How to Adapt These Tenders for Different Kitchens and Diets
Gluten-Free Version
Swap the flour for a gluten-free all-purpose blend and use certified gluten-free panko. The coating still gets crisp, though the crumb can be a little more delicate, so press it on firmly and move the tenders with a thin spatula.
Lower-Sugar Coconut Coating
Use unsweetened coconut if you want less sweetness and a slightly more savory finish. You’ll lose some of the caramel-like browning from sweetened coconut, so watch the color closely and don’t let the coating go too far past golden.
Oven-to-Air-Fryer Shortcut
An air fryer gives you an even crisper crust in less time, but the coconut can darken quickly. Cook in a single layer and start checking early so the outside doesn’t outrun the chicken inside.
Storage and Reheating
- Refrigerator: Store in an airtight container for up to 4 days. The crust softens a little, but it holds up better than most baked breaded chicken.
- Freezer: Freeze after baking on a sheet pan, then transfer to a bag or container. Reheat from frozen for the best texture instead of thawing, which can make the coating soggy.
- Reheating: Warm in a 400°F oven or air fryer until the coating crisps back up and the center is hot. The biggest mistake is microwaving them, which makes the coconut go chewy and the crust loose.
Questions I Get Asked About This Recipe

Crispy Coconut Chicken Tenders
Ingredients
Equipment
Method
- Preheat the oven to 425°F and line a sheet pan with parchment paper for easy cleanup and crisping.
- Place flour in one bowl and whisk in garlic powder with salt and pepper until evenly seasoned.
- Whisk the eggs in a second bowl until smooth and fully combined.
- Add the shredded coconut and panko breadcrumbs to a third bowl and stir together into an even coating.
- Dredge each chicken tender in the seasoned flour, coating all sides with a thin, even layer.
- Dip the floured chicken tender into the eggs, letting excess drip back into the bowl.
- Press the egg-dipped chicken tender firmly into the coconut-panko mixture so the coating adheres and bakes crisp.
- Arrange the coated tenders on the prepared sheet pan in a single layer with space between them for airflow.
- Bake for 18-20 minutes, flipping halfway, until golden and the chicken reaches 165°F internally.
- Let the tenders cool slightly before serving so the coating sets and stays crunchy.