
Banana split ice cream sandwich cake is the kind of frozen dessert that disappears in clean, square slices and somehow tastes like a throwback picnic and a birthday party at the same time. The ice cream sandwiches soften just enough to cut neatly, while the bananas, chocolate sauce, strawberry sauce, pineapple, and whipped topping keep each bite moving between creamy, fruity, and crunchy. It looks playful on the table, but the real win is how little effort it takes for something that feels this celebratory.
The structure matters here. The parchment overhang gives you a clean lift from the pan, and the brief freezer time firms everything into layers instead of a messy scoop-and-serve situation. Draining the pineapple is one of those small steps that makes a big difference; if it goes in wet, the cake turns icy and the layers slide around when you cut it. Keeping the whipped topping on top instead of folding it through also helps the cake hold its shape straight from the freezer.
Below you’ll find the exact layering order that keeps the cake stable, plus a few smart swaps if you want to change the flavor without losing that classic banana split feel.
The layers held together perfectly and the parchment made it easy to lift out in one piece. I let it sit for 5 minutes before slicing and the bananas stayed in place instead of sliding everywhere.
This banana split ice cream sandwich cake is the one to save for cookouts when you want a frozen dessert that slices clean and still gives you those classic banana split layers.
The Layering Trick That Keeps This Frozen Cake from Slumping
Frozen dessert cakes fail when the layers are too wet or too soft to support each other. With this one, the ice cream sandwiches do most of the structural work, so the fillings need to stay light and contained. That means drained pineapple, a gentle hand with the sauces, and enough freezing time for the whole pan to set into a single sliceable slab.
The other thing that matters is order. Bananas go directly against the sandwiches where they can nest into the soft surface, sauces follow so they soak in a little without flooding the pan, and the whipped topping seals everything in from above. If you reverse that order, the fruit starts slipping and the top layer turns messy when you cut it.
What Each Ingredient Is Actually Doing in This Cake
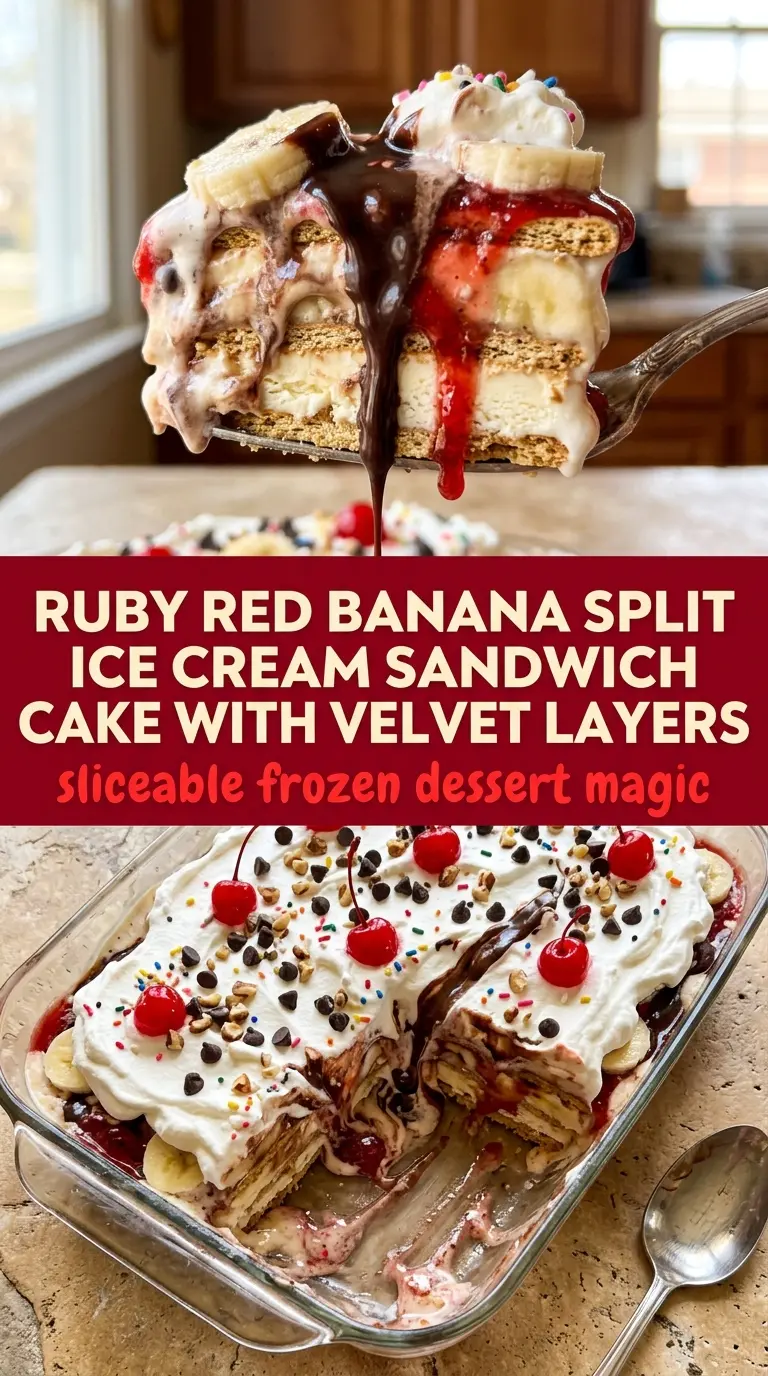
- Ice cream sandwiches — These are the backbone of the cake. They soften just enough in the freezer to taste creamy, but they still cut into neat squares. Generic vanilla works fine, and chocolate or Neapolitan sandwiches are an easy swap if you want a different base flavor.
- Bananas — Use ripe bananas with some yellow showing and only a few brown freckles. Under-ripe bananas taste flat here, while overly soft ones can turn mushy and darken fast.
- Chocolate and strawberry sauce — These give you the banana split effect without needing to cook a compote or ganache. Thick bottled sauces work best because thin syrup runs into the edges and makes the layers slide.
- Crushed pineapple, drained — The pineapple brings brightness and keeps the dessert from tasting one-note. Drain it well and even press it lightly in a strainer; extra juice is the fastest way to get icy pockets.
- Whipped topping — This is the finishing layer that holds the toppings in place and stays stable in the freezer. Homemade whipped cream can work, but it’s softer and won’t hold up as long once the cake warms slightly for slicing.
- Chopped peanuts, cherries, and sprinkles — These are the classic banana split finish. The peanuts give crunch, the cherries give that old-school sundae look, and the sprinkles make the top feel festive without adding extra work.
Building the Layers So the Cake Cuts Cleanly
Start with the parchment and the first sandwich layer
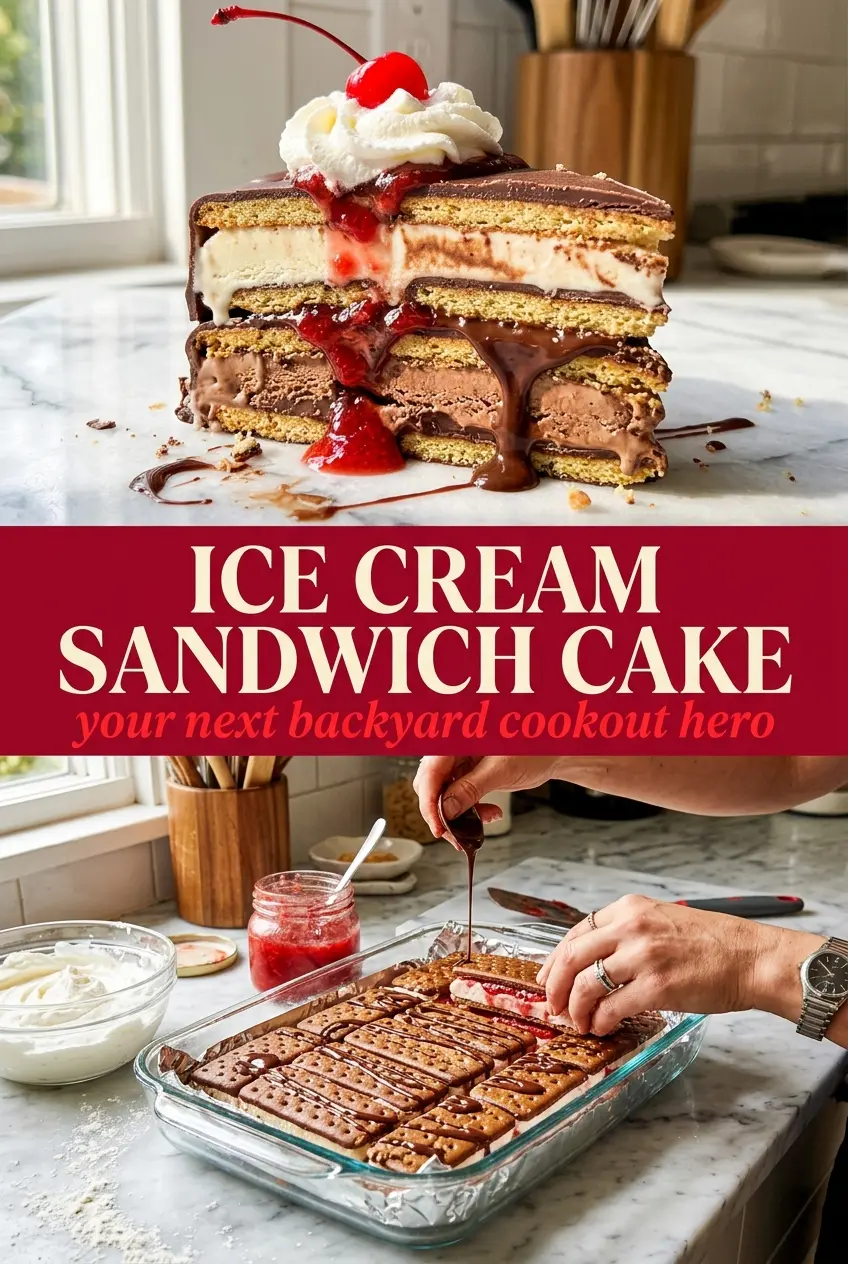
Line the pan with parchment and leave enough overhang to lift the cake out later. Arrange the ice cream sandwiches in a tight layer, trimming the last pieces if you need to close gaps. A loose first layer gives you uneven slices, and once the fillings go in, it’s too late to fix the base.
Add the fruit and sauces in a controlled order
Lay the banana slices over the sandwiches, then drizzle the chocolate and strawberry sauces over the fruit. Keep the sauces in ribbons rather than pouring them all in one spot, or they’ll pool at the edges and make the bottom layer slippery. Spread the drained pineapple over the top so it forms an even, bright layer instead of a wet mound in one corner.
Finish with topping and freeze until firm
Add the second layer of sandwiches and press down gently so the fillings settle into the spaces below. Spread the whipped topping all the way to the edges, then finish with peanuts, cherries, and sprinkles before freezing. Four hours is the minimum, but overnight gives you the cleanest slices and the best hold when you lift it from the pan.
Three Ways to Bend This Recipe Without Breaking It
Strawberry Banana Split Version
Swap in strawberry ice cream sandwiches and add a layer of sliced strawberries with the bananas. The cake will taste fruitier and a little lighter, but it still keeps the same classic split-cake structure.
Dairy-Free Version
Use dairy-free ice cream sandwiches and a coconut-based whipped topping. The texture stays close, though the flavor picks up a slight coconut note that works well with the banana and pineapple.
Nut-Free Finish
Leave off the peanuts and add extra sprinkles or crushed cookies on top instead. You lose the salty crunch, but the cake still has enough texture from the sandwich layers and the fruit to feel complete.
Storage and Reheating
- Refrigerator: Not ideal. This dessert softens fast and the layers lose their shape within an hour or two.
- Freezer: Wrap the pan tightly or store slices in an airtight container for up to 1 week. After that, the bananas start to darken and the texture turns icy.
- Reheating: There’s no reheating here. Let slices sit at room temperature for 5 to 10 minutes before serving so the knife slides through without crushing the layers.
Answers to the Questions Worth Asking
Banana Split Ice Cream Sandwich Cake
Ingredients
Equipment
Method
- Line a 9x13-inch pan with parchment paper, leaving overhang on the sides, so the frozen cake can be lifted out cleanly later.
- Arrange a layer of ice cream sandwiches across the bottom of the pan, trimming to fit if needed, then ensure they sit flat.
- Top with a layer of sliced bananas, then drizzle chocolate sauce and strawberry sauce in swirled pockets for visible layers.
- Spread the crushed pineapple evenly over the sauces so the fruit is distributed in each slice.
- Add a second layer of ice cream sandwiches on top, pressing down gently to help the cake set into one sliceable layer.
- Spread the whipped topping over the entire surface in an even layer with smooth coverage to seal in the layers.
- Sprinkle with chopped peanuts and rainbow sprinkles, then arrange maraschino cherries on top as the center crown.
- Freeze for at least 4 hours or overnight until firm (no temperature needed), then lift out using the parchment overhang and slice straight from the freezer.