
Red Velvet Lava Cakes are little treats that bring a perfect mix of rich chocolate and a hint of tangy cocoa with that beautiful deep red color. Inside, they’re warm and gooey, with a molten center that spills out when you cut into them. These cakes are soft and tender on the outside, with that special molten chocolate surprise waiting at the core.
I love making these cakes for special occasions or when I just want something a bit fancy but still quick and easy to whip up. The lava center is what makes this recipe extra fun—watching that smooth filling ooze out always brings a smile and a little sense of magic. I like to use a simple cream cheese frosting or a dusting of powdered sugar on top to keep it light and not too sweet.
If you ever want to impress friends or family, serving these warm lava cakes with a scoop of vanilla ice cream or some fresh berries is my go-to. It balances the richness and adds a nice fresh note. Plus, the best part is everyone gets their own little personal cake—that always feels like a special treat!
Key Ingredients & Substitutions
Chocolate: Semi-sweet or dark chocolate gives the lava center its rich taste. If you don’t have these, bittersweet or even milk chocolate will work but may be sweeter. Avoid white chocolate as it changes the flavor profile.
Butter: Unsalted butter is best for controlling saltiness. You can use salted butter, but reduce or skip the added salt to balance flavors.
Flour & Cocoa Powder: All-purpose flour provides structure, while cocoa powder adds that classic red velvet chocolate note. Use Dutch-processed cocoa if you want a smoother, less acidic flavor, but natural cocoa powder is fine too.
Eggs & Egg Yolks: Eggs add richness and help create a tender texture. Using extra yolks boosts the moist, gooey center—don’t skip them for the best lava effect.
Buttermilk: It adds tanginess and reacts with cocoa powder to keep the cake moist. You can substitute with plain yogurt or milk mixed with a splash of lemon juice if needed.
Red Food Coloring: Gel or liquid works well. Gel gives more intense color without extra moisture. You can skip coloring, but then it won’t have that iconic red velvet look.
How Can I Get the Perfect Molten Center in My Lava Cakes?
The key to a gooey, molten lava center is all about baking time and batter consistency. Here’s how to nail it:
- Watch the Oven Time: Bake just until the edges are set but the middle still jiggles slightly, usually around 12-14 minutes. Overbaking will dry out the center.
- Preheat Properly: A hot oven (425°F/220°C) helps the outside cook quickly while leaving the center soft.
- Use the Right Ramekins: Use small, oven-safe cups or ramekins so the cakes cook evenly. Butter and flour them well to ensure easy release.
- Cool briefly before unmolding: Letting cakes rest for 1 minute after baking helps them hold their shape but keeps the lava ready to flow.
- Ramekins or oven-safe cups – I like using these small dishes because they help the cakes bake evenly and hold that perfect molten center.
- Mixing bowls – for melting chocolate and mixing the batter; sturdy ones make stirring easier.
- Double boiler or heatproof bowl and saucepan – to gently melt chocolate and butter without burning.
- Whisk or spatula – helps combine ingredients smoothly without lumps.
- Measuring cups and spoons – for precise ingredients, especially for baking!
- Baking sheet – to hold the ramekins securely in the oven and catch any drips.
- Chocolate chip or chunks: Mix them into the batter for pockets of melty chocolate inside.
- Mint or orange zest: Add a little zest or extract to give a fresh twist to the rich flavor.
- Cheesecake swirl: Drop small spoonfuls of cream cheese into the batter before baking for a creamy surprise.
- Different berries: Top with strawberries, raspberries, or blueberries for added freshness and color.
- 4 oz (115g) semi-sweet or dark chocolate, chopped
- 1/2 cup (115g) unsalted butter
- 1 cup (120g) all-purpose flour
- 1 cup (200g) granulated sugar
- 2 tablespoons unsweetened cocoa powder (preferably Dutch-processed)
- 1/4 teaspoon salt
- 2 large eggs
- 2 large egg yolks
- 2 tablespoons buttermilk
- 1 teaspoon vanilla extract
- 2 teaspoons red food coloring (liquid or gel)
- Powdered sugar, for dusting
- Vanilla ice cream, for serving
- Fresh strawberries or berries, for garnish (optional)
Follow these steps, and when you cut into the cake, the warm, chocolatey center will slowly ooze out, making this dessert extra special!
Equipment You’ll Need
Flavor Variations & Add-Ins
How to Make Red Velvet Lava Cakes
Ingredients You’ll Need:
Main Ingredients:
For Serving and Finishing:
How Much Time Will You Need?
This recipe takes about 10 minutes to prepare and around 12-14 minutes to bake. So, in total, plan for approximately 25 minutes including a brief cooling time before serving. It’s a quick and delightful dessert you can enjoy soon after starting!
Step-by-Step Instructions:
1. Preparing Your Baking Dishes and Oven:
Start by preheating your oven to 425°F (220°C). Butter and lightly flour 4 to 6 ramekins or oven-safe custard cups. This helps the cakes come out easily. Arrange the ramekins on a baking sheet for easy handling in and out of the oven.
2. Melting Chocolate and Butter:
Put the chopped chocolate and butter in a heatproof bowl. Place the bowl over a pot of simmering water (this is called a double boiler). Stir gently until everything is melted and smooth. Remove from heat and let it cool just a bit so it won’t cook the eggs in the next step.
3. Mixing Dry Ingredients:
In another medium bowl, whisk together the flour, granulated sugar, cocoa powder, and salt. Make sure it’s all combined to distribute the cocoa and sugar evenly.
4. Combining Wet Ingredients:
In a separate bowl, beat the eggs, egg yolks, buttermilk, vanilla extract, and red food coloring. Whisk until the color is even and the mixture is smooth.
5. Making the Batter:
Pour the dry ingredients slowly into the wet ingredients, stirring gently to combine. Be careful not to overmix — just stir until the flour disappears.
Now fold in the melted chocolate and butter mixture until it’s all combined into a smooth batter.
6. Filling and Baking:
Divide your batter evenly into the prepared ramekins. Bake them in your hot oven for 12 to 14 minutes. You want the edges to look set and the tops to feel firm but the center should still jiggle a little — that’s the molten lava part!
7. Serving Your Lava Cakes:
Once baked, take the ramekins out and let the cakes cool for just one minute. Run a knife around each ramekin’s edge to loosen the cake, then carefully flip them onto serving plates.
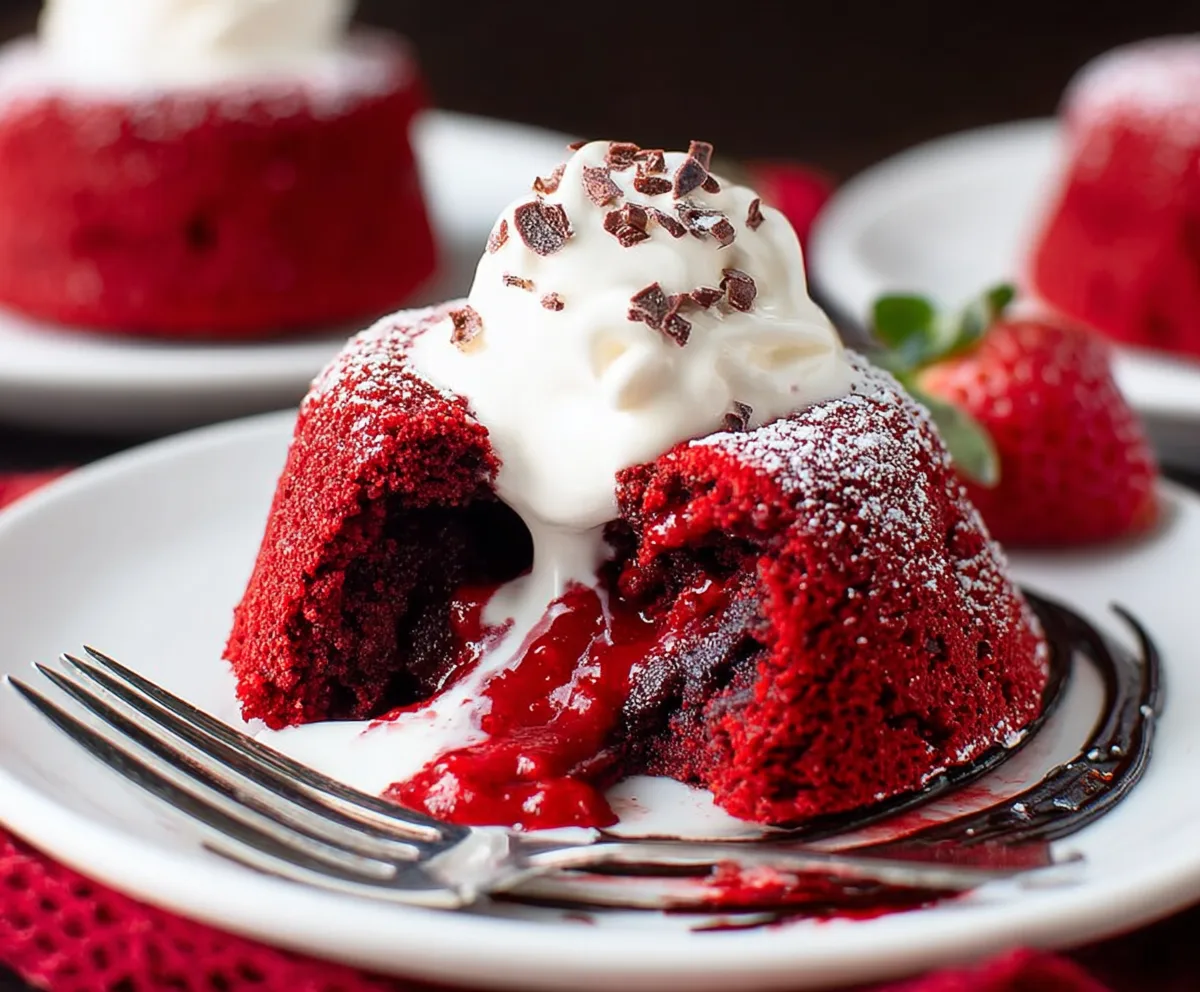
Lightly dust the cakes with powdered sugar. Add a scoop of vanilla ice cream on top, and garnish with fresh strawberries or berries if you like. Enjoy right away so you can dig into that warm, red velvet lava center!
Can I Make These Lava Cakes Ahead of Time?
Yes! You can prepare the batter and fill the ramekins ahead, then cover and refrigerate for up to 24 hours. When ready, bake them straight from the fridge—add a minute or two to the baking time if needed.
What Can I Use Instead of Buttermilk?
If you don’t have buttermilk, mix 2 tablespoons of milk with 1 teaspoon of lemon juice or white vinegar. Let it sit for 5 minutes before using to mimic the tangy flavor and acidity.
How Should I Store Leftover Lava Cakes?
Lava cakes are best enjoyed fresh, but you can store leftovers in an airtight container in the refrigerator for up to 2 days. Reheat gently in the microwave or oven until warm before serving.
Is It Possible to Make These Gluten-Free?
Yes! Substitute all-purpose flour with a gluten-free flour blend formulated for baking. Make sure it contains xanthan gum or a similar binder for the best texture.